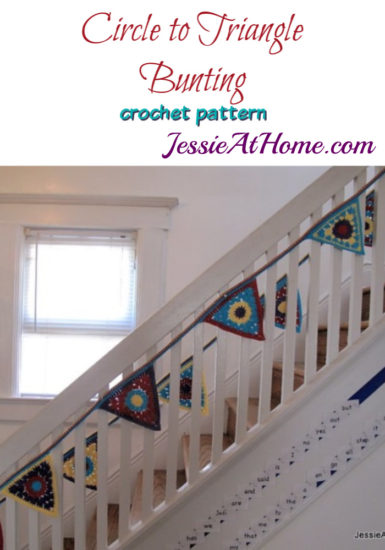
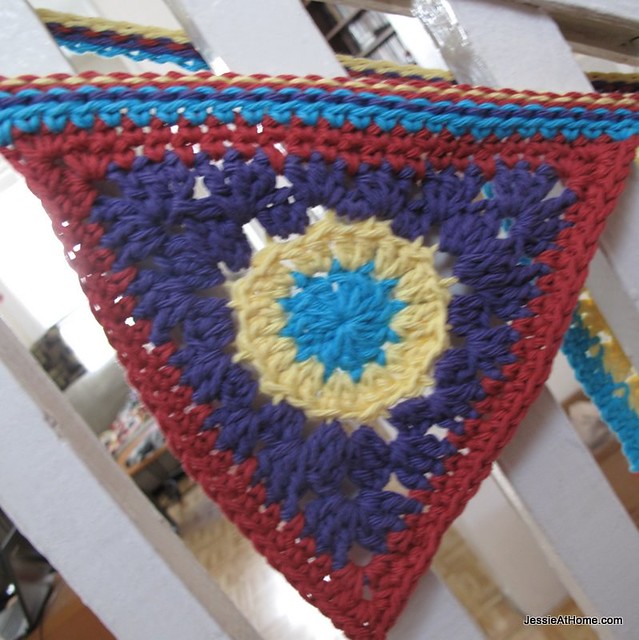
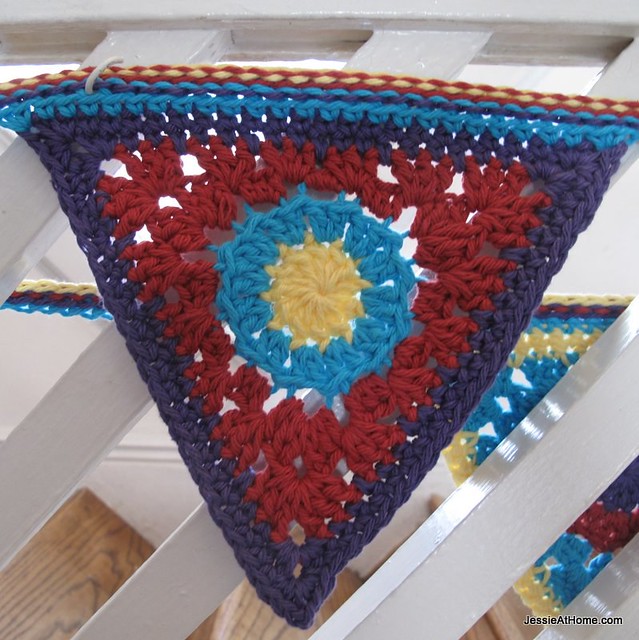
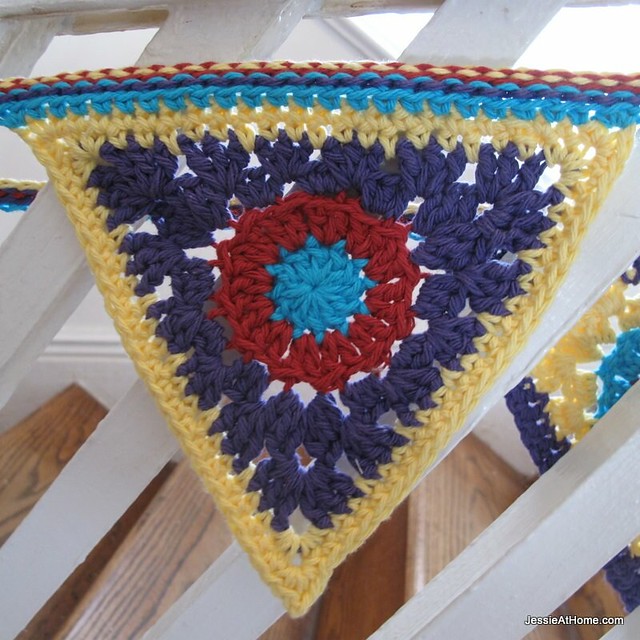
This granny inspired creation starts out with a circle, then transitions into a triangle. Make it all one color, or up to 6 different colors. Change up the colors for different seasons. You can use the triangles just as is for various uses, or string them together to make bunting. In honor of Crochetville’s slip stitch event ~ Summer is Slipping Away, I have included instructions on how to make the bunting with a wider ribbon~like string, which is made using slip stitch crochet. Enjoy!

Circle to Triangle Bunting
Crochet Pattern
Easy Skill Level
Designed by Jessie Rayot
Yarn:
Whatever you want, though sample was made with Lily Sugar ‘n Cream
Hook:
use the size that works best with your yarn, sample was made with 5mm
Gauge:
not important, as long as your tension is consistent you are good to go!
Stitches and Skills used:
ch ~ chain
sc ~ single crochet
hdc ~ half double crochet
dc ~ double crochet
tr ~ treble crochet
sl st ~ slip stitch
Rnd ~ round
St(s) ~ stitch(es)
Sp ~ space
Beg ~ beginning
Rep ~ repeat
Pattern:
Ch 3, sl st into first ch to form a loop, or make a magic loop

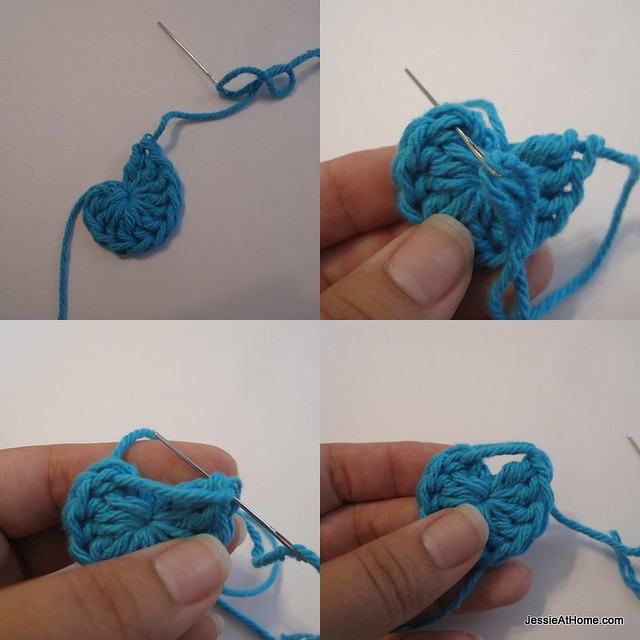
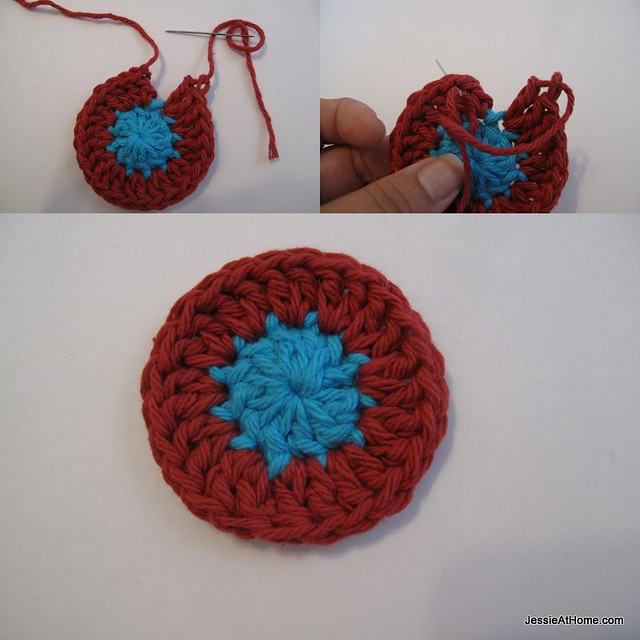
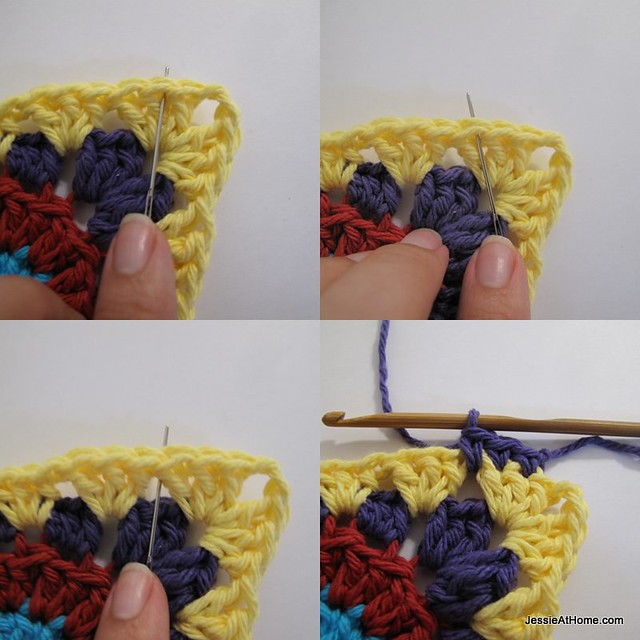
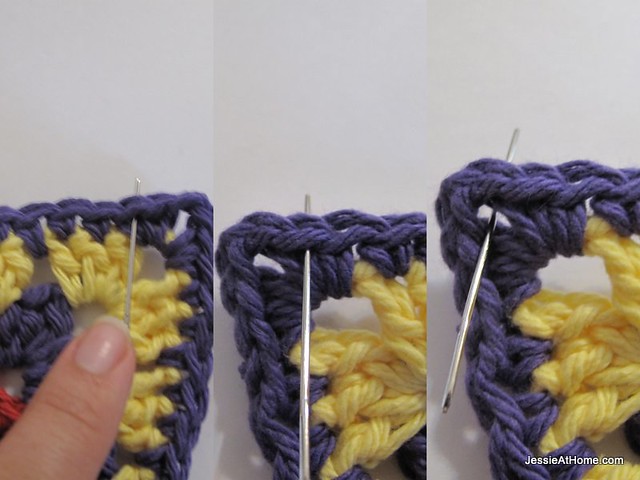
Rnd 1: ch3 (counts as first dc) 11 dc into loop, clip yarn and end off rnd. See pictures below for how to finish the round ~ When the last dc is complete, clip the yarn and pull the loop so that the end of the yarn comes through. Thread the yarn onto a yarn needle. Sew the yarn under the top ch from the beg ch3, then sew it back down through the last dc. Weave in ends and clip. This is how all the rounds will end. (12 dc in rnd)
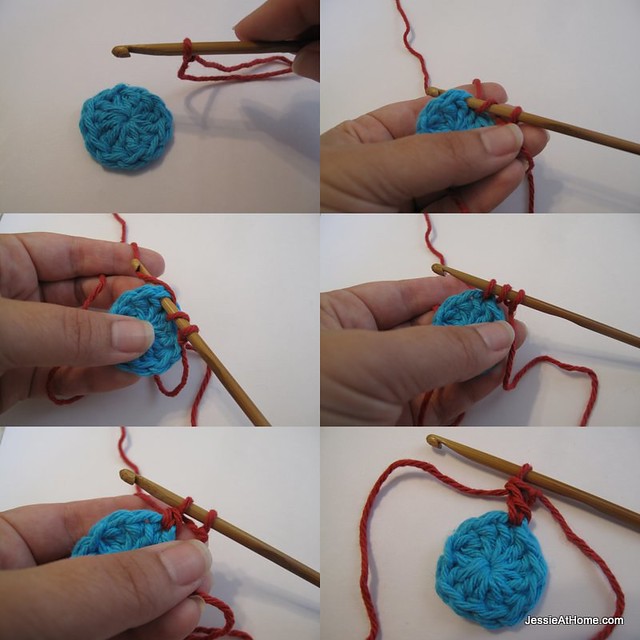
The remaining rnds will start with a standing dc, or standing sc. These sts are made by starting with a new yarn on your hook, and just making the dc or sc into your work. To see an example, look at the pictures below. To make a standing dc, see pictures below. Make a slip knot and place loop on your hook. YO, insert hook into st, yo, pull through st, yo, pull through 2 loops, yo, pull through 2 loops. Standing dc made.
Rnd 2: Start with a standing dc in any st of rnd 1, dc in same st, 2dc in each of remaining sts around, clip yarn and end off rnd, sewing last st to top of beg standing dc (24dc)
The next few rnds may look wonky at first, but it will look better as the triangle is finished, and after it is blocked.
Rnd 3: worked in back loop only for this rnd only, make a standing dc in back loop of any st, (2dc, ch2, 3dc) in same st, *sk1, 3hdc in next st, sk1, 3sc in next st, sk1, 3hdc in next st, sk1, (3dc, ch2, 3dc) in next st, rep from * one more time, sk1, 3hdc in next st, sk1, 3sc in next st, sk1, 3hdc in next st, clip yarn and end off rnd, sewing last st to top of beg standing dc
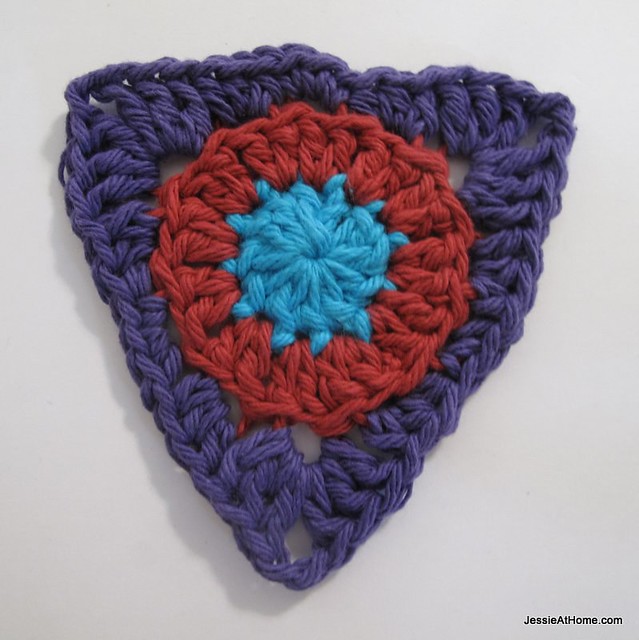
Rnd 4: make a standing dc in one of the ch2 sps from rnd 3, (2dc, ch2, 3dc) in same sp, *3dc after next cluster of sts, (3hdc after next cluster of sts) twice, 3dc after next cluster of sts, (3dc, ch2, 3dc) in ch2 sp, rep from * one more time, 3dc after next cluster of sts, (3hdc after next cluster of sts) twice, 3dc after next cluster of sts, clip yarn and end off rnd, sewing last st to top of beg standing dc

See the pictures below to know where to place the sts in the next rnd. Essentially you will be skipping the first st of each side.
Rnd 5: make a standing sc in the second st of one of the sides, *sc across side to corner, working into the sp between clusters on ever third sc, as seen above, (2sc, ch2, 2sc) in ch2, skip first st of next side, rep from * twice more, clip yarn and end off rnd, sewing last st to top of beg standing sc (21 sc on each side)
The pictures below show placement for the first sc of each side, the last sc of each side, and the corner sts
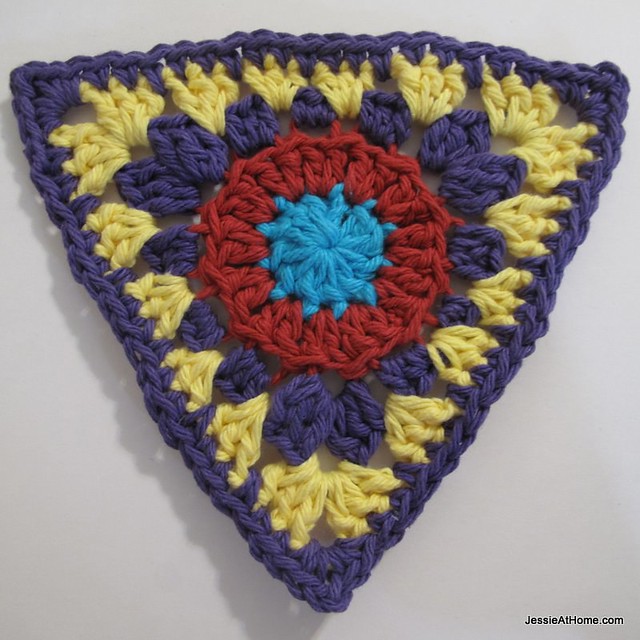
Rnd 6: make a standing sc in the second st of one of the sides, *sc across side to corner, (2sc, ch2, 2sc) in ch2, skip first st of next side, rep from * twice more, clip yarn and end off rnd, sewing last st to top of beg standing sc (24 sc on each side)
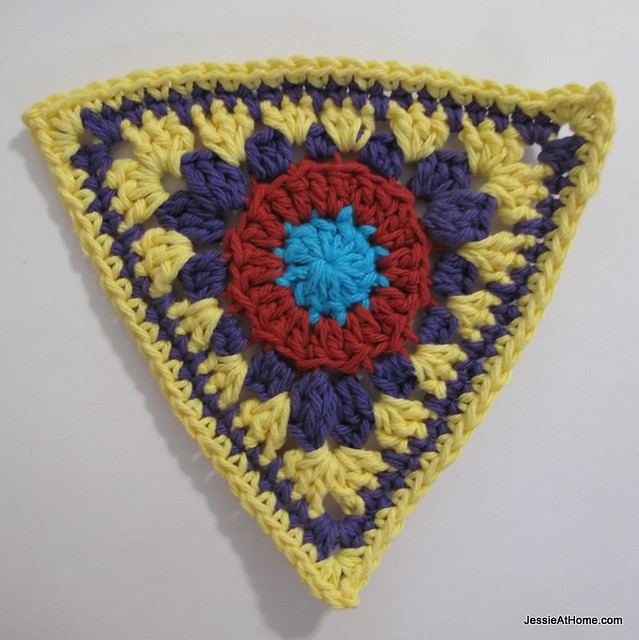
Your triangle is done!! At this point you will want to block your triangle. To do this lay it your blocking pad or ironing board, right side down. Pin down the 3 corners, pulling the piece enough to give it a nice shape. Hold a steam iron OVER the piece (do not touch the piece with the iron) and steam well. Leave it pinned down for 24 hours.
Want to make it into bunting?
Here is a fun way to do that!
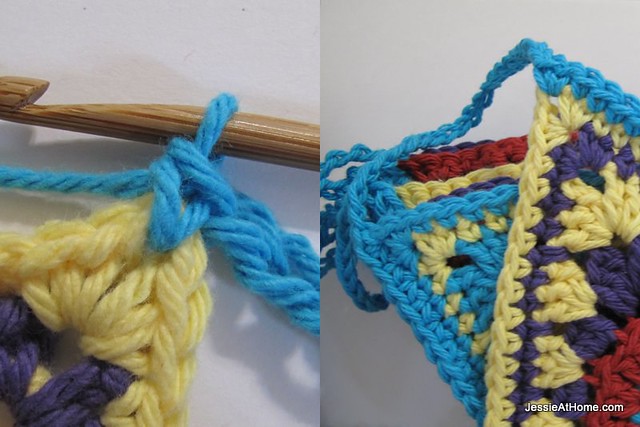
Row 1: ch 20, sl st into first ch to form loop, *ch 20, 2sc in corner of triangle, sc in each sc across top of triangle, 2sc in corner of triangle, rep from * until all triangles are connected, ch 20, place a marker, ch 20, sl st into st with marker to form a loop, clip yarn and end off, turn
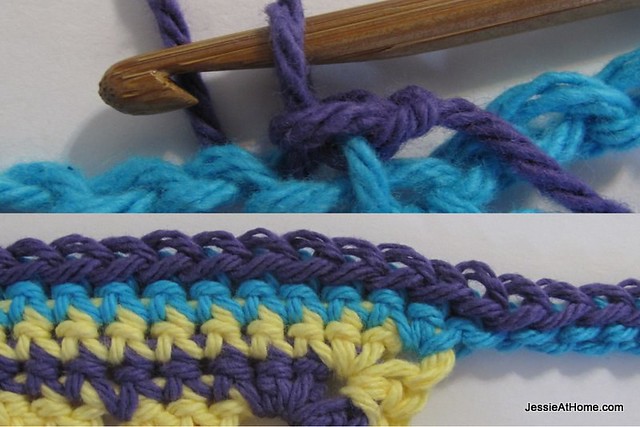
Row 2: make a slip knot on hook, starting in ch just after last loop made in row 1, sl st in front loop of each ch and sc across to first loop, clip yarn and end off, turn
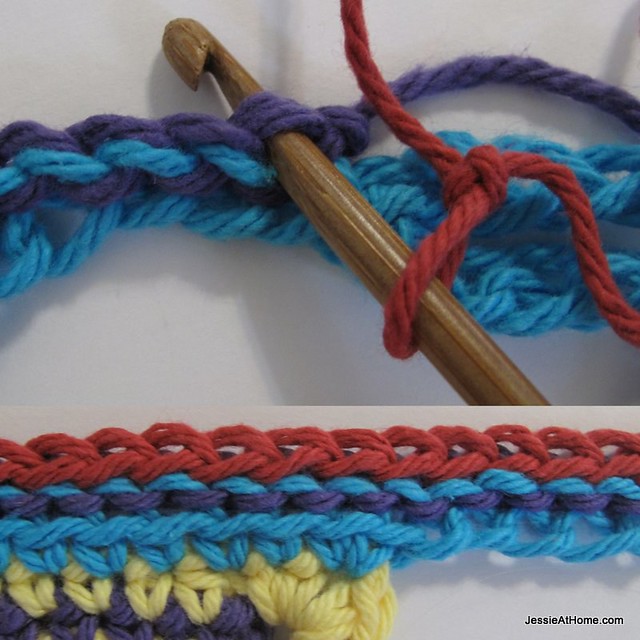
Row 3: make a slip knot on hook, sl st in front loop of each sl st from previous row, clip yarn and end off, turn
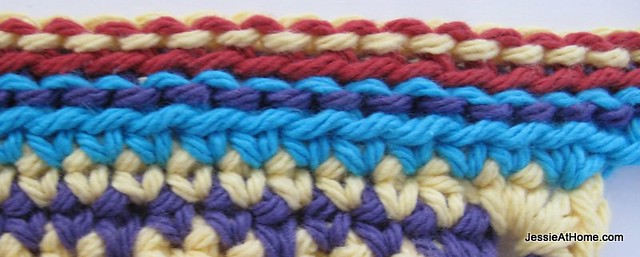
Rep row 3: until ribbon is desired width
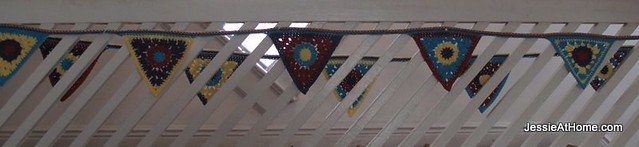
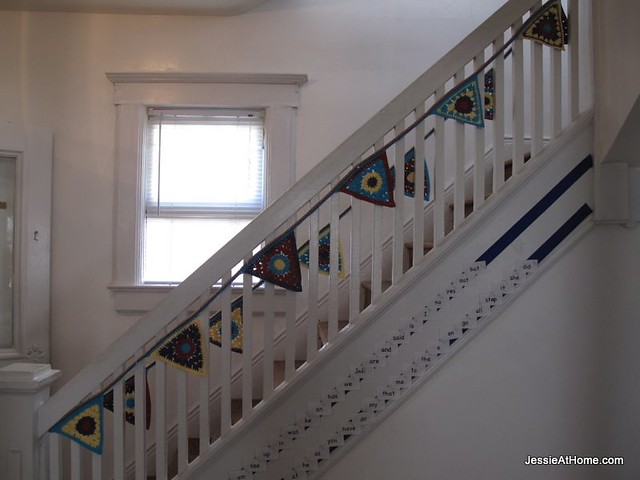
Weave in ends, hang and enjoy! *As you can see, I made mine a bit long. It has 12 triangles, and wraps complely around my stair rails. I like it. It brightens up both sides of the stairs!*
**if you want your bunting to be viewed from both sides, then flip every other triangle around so they alternate front and back.
**You can make your bunting longer or shorter between triangles by adding more or less chs between each.
**I attached my triangles with sc, as instructed on row 1; however, if you prefer, you could attach them with a slip stitch, a hdc, or a dc, whatever look you like. The taller the st, the longer the triangles will hang.
To find a printer friendly version of this pattern (text only, in black, no photos) click here. This will bring you to the listing for this pattern on Craftsy, where you can also find printer friendly versions of all my free patterns, and where you can purchase my sale patterns.
[signature]


I have been crocheting a long time, but I haven’t ever heard of a standing dc or sc. Please explain.
I like the way you finished off each row with a sewing needle not leaving a finishing knot. Also, not leaving a color change stitch. Thanks for your help. Merry Christmas!!
The standing double crochet is explained in the pattern, and there are photos showing it as well. Maybe you just look through too quickly (I do that all the time!)
Thank you, and Merry Christmas to you, as well!
Going to make an afghan with this.
That sounds like fun! I’d love to see pictures.
I was looking for exactly this, a circle within a triangle! Thank you!
Question: What do you think I would need to do to then create a circle around this? It may sound weird to go from circle to triangle back to circle again, but I’m trying to make the top to a beanie/slouch based on the Philippine flag.
That would take a lot of experimenting to figure out, so I don’t really have an answer for you. I’d say just play around with it and see what you can make happen.