



Inside: The slip knot and crochet chain are the first skills you need to crochet. Here’s a video, written instructions with photos, and some tips.
The crochet chain stitch is the first stitch most crocheters learn. You make a slip knot, then you make a crochet chain long enough to wrap a city block! In this Stitchopedia crochet tutorial you’ll learn how to hold your yarn and hook, how to make a slip knot, and how to crochet a chain stitch. You’ll also learn about the anatomy of the chain.
This tutorial was originally published on May 28, 2014. The most recent update was made on August 7, 2026.
Table of contents
As a beginner crocheter, sometimes it can be hard to find out how to make the most basic of stitches. Frequently, the first row of stitches in a crochet pattern start off with chains. Plus, you’ll often find turning chains used as the first stitch of a new row or round in crochet pattern instructions.
This easy to follow tutorial will guide you through making your first chain stitch and on to more and more chain stitches until you are confident enough to begin your first row of other crochet stitches. You’ll find a right hand and left hand video tutorial, along with step by step written instructions and photos. Are you ready?
Stitches and Abbreviations
Here’s a list of the stitches that will be used, as well as any abbreviations. Click on highlighted stitches for tutorials.
ch: chain
st(s): stitch(s)
yo: yarn over (wrap the yarn over the hook from back to front to back again)
Getting Started
To begin, it is important to know the difference between the front of your work and the back of your work. When you are working, you hold the hook in front of your body. The front of your work is between your hook and you and is the side facing you. The back of your work is behind your hook, and is the side facing away from you. Please note the front of your work will not always be the right side of your work. Conversely, the back of your work will not always be the wrong side.
You also should know the difference between the tail or cut end of your yarn, and the working or live end of your yarn.
- Before your yarn has been transformed into anything there is the starting tail of your yarn. The starting tail, or cut end, is the beginning of the yarn.
- The yarn that is still attached to the ball or skein of yarn is called the live yarn/live end or the working yarn/working end.
Slip Knot Chart Symbol
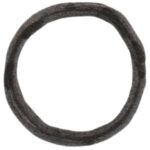
There is no traditional chart symbol for a slip knot. It’s usually assumed you know when you need to make one. If there’s a reason why a specific chart would need a symbol for a slip knot, then the artist would most likely create one. Personally, I would suggest a small dot outline. The small filled in dot is the symbol for a slip stitch, so it seams to me a small dot outline would be a good choice for a slip knot, if the symbol is really needed.
How To Make A Slip Knot With A Crochet Hook
Step by Step Instructions with Photos – Slip Knot With A Crochet Hook
To make a slip knot, hold your crochet hook in your your dominate hand.
Hold the hook in front of you with the hook part facing down. Take the cut end of the yarn and hold it in back of the hook.
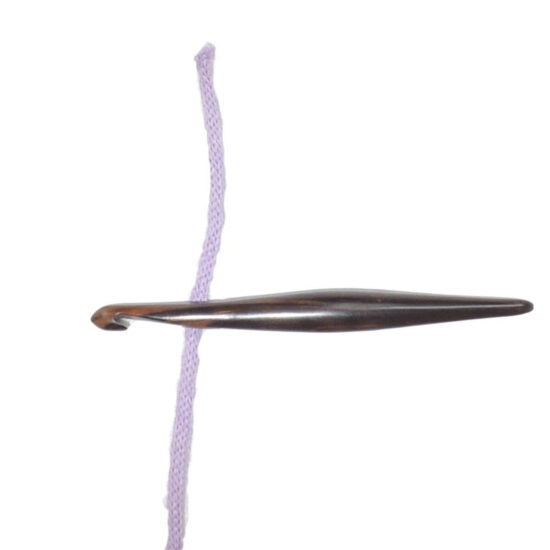
Wrap cut end of the yarn over top of the hook, around the front…
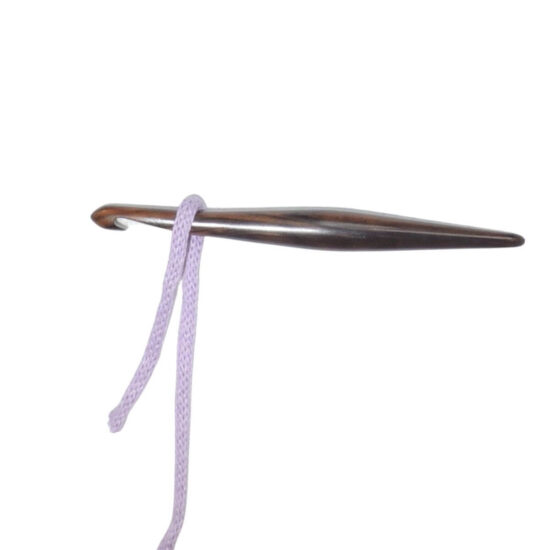
…and around to the back again. The yarn will cross over itself.
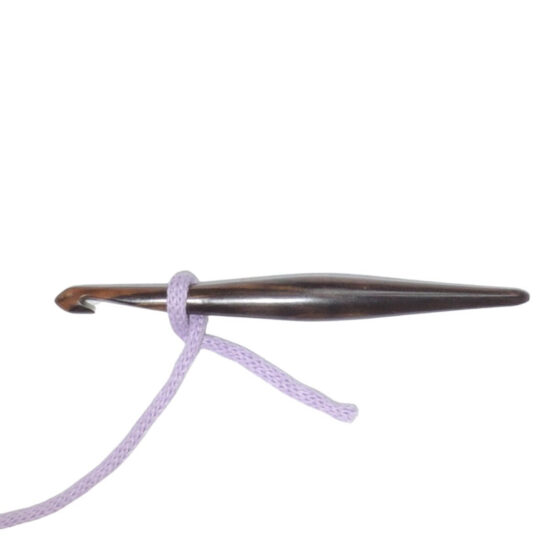
Leaving the cross-over alone, pick up the end of the working end – the yarn that is still attached to the ball of yarn,
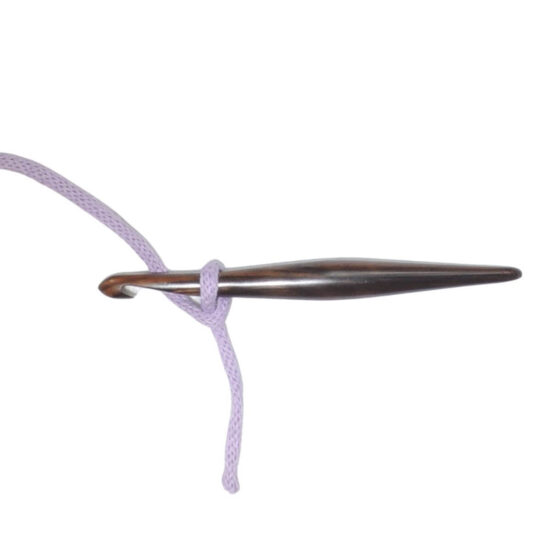
and wrap it around your hook (back to front to back again)
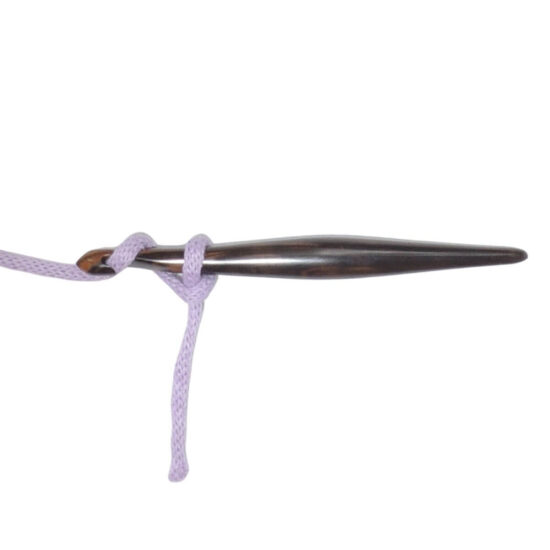
Pull that loop just made through the first loop you created to make a slip knot.
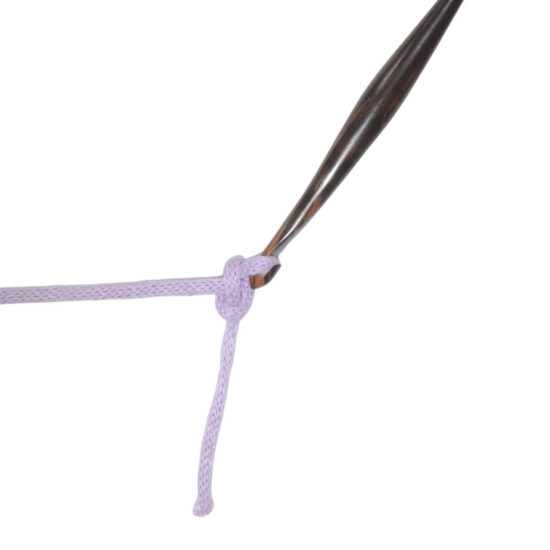
Done!
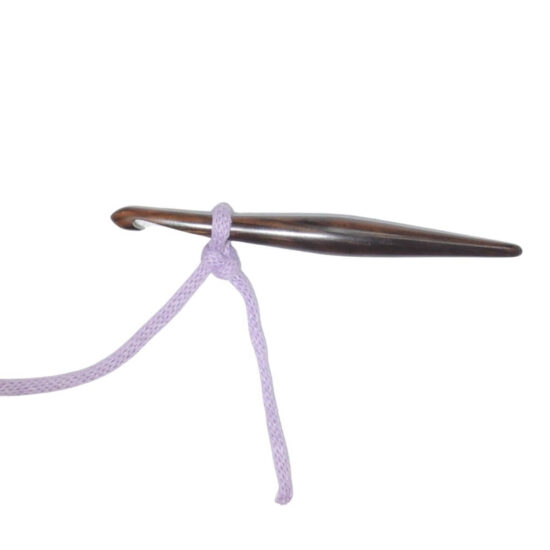
It is really much easier to watch this in the video than to read. Take a look at the video tutorial if you need more help.
Step by Step Illustrations – Slip Knot With A Crochet Hook
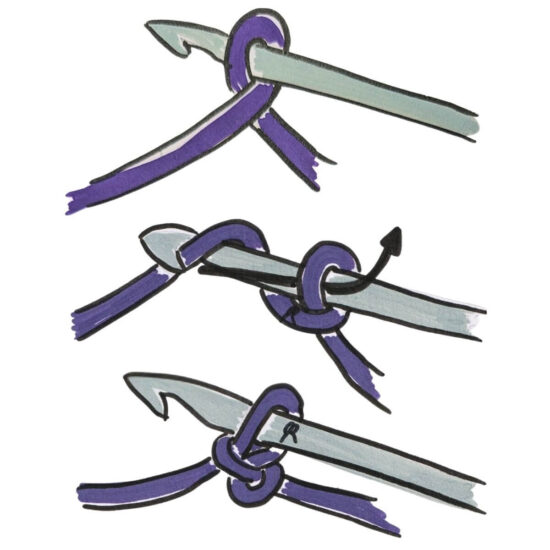
Right Handed Video Tutorial – Slip Knot With A Crochet Hook
If you can’t see this video, try watching it on YouTube HERE.
Left Handed Video Tutorial – Slip Knot With A Crochet Hook
If you can’t see this video, try watching it on YouTube HERE.
How To Make A Slip Knot By Hand
Step by Step Instructions with Photos – Slip Knot By Hand
Hold the cut end of your yarn above your non-dominate hand, then wrap your bottom 3 fingers around the working end. Leave your index finger and thumb sticking out, as if ready to pinch.
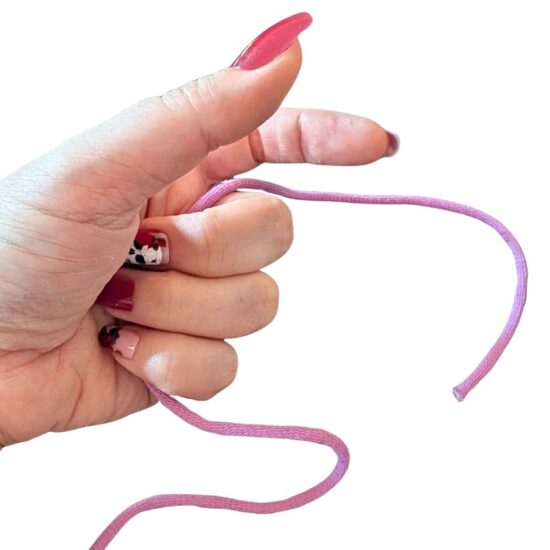
Wrap the cut end under your index finger, around the top of your index finger and your thumb, then under your thumb and index finger, letting it hang on the outside of your remaining 3 fingers after wrapping.
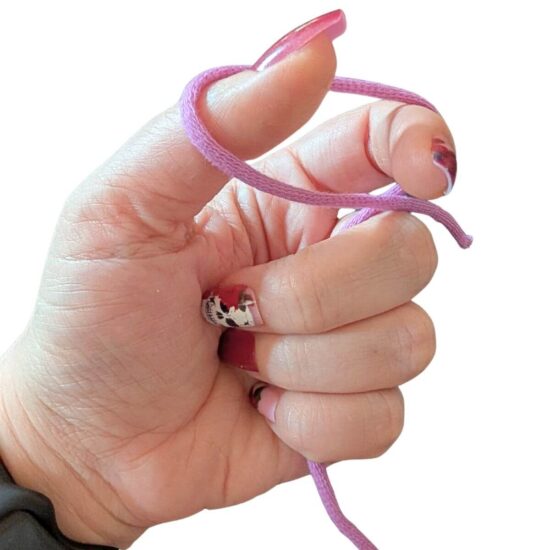
Open your bottom 3 fingers and grab the working yarn with your dominate hand, lift the working yarn up and pinch it between your thumb and index finger of your non-dominate hand.
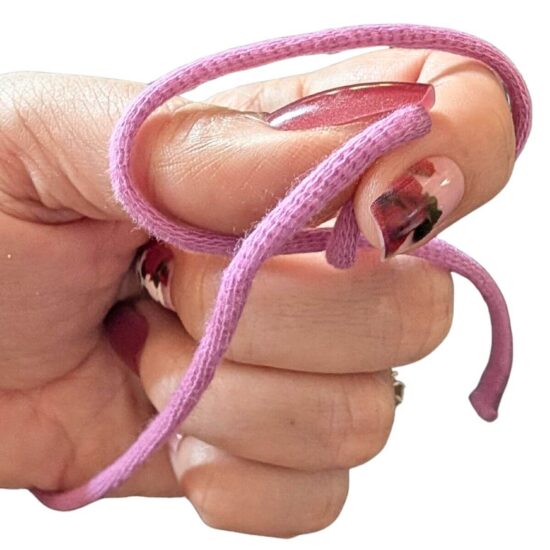
Use your dominate hand to slide the loop around your thumb and index finger down over the pinched yarn.
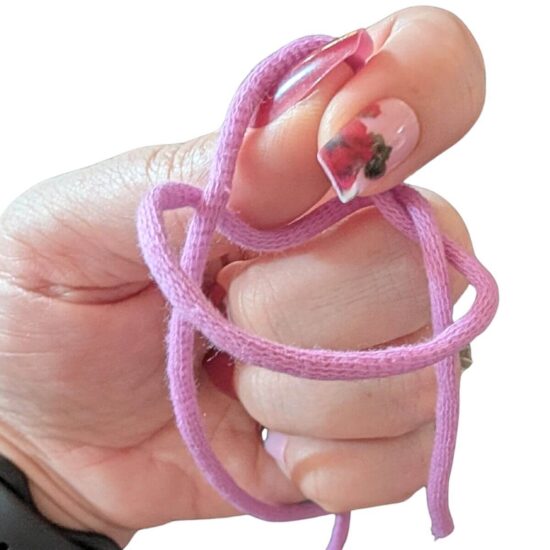
Continue pinching and use your dominate hand to pull the cut end of your yarn to tighten the slip knot.
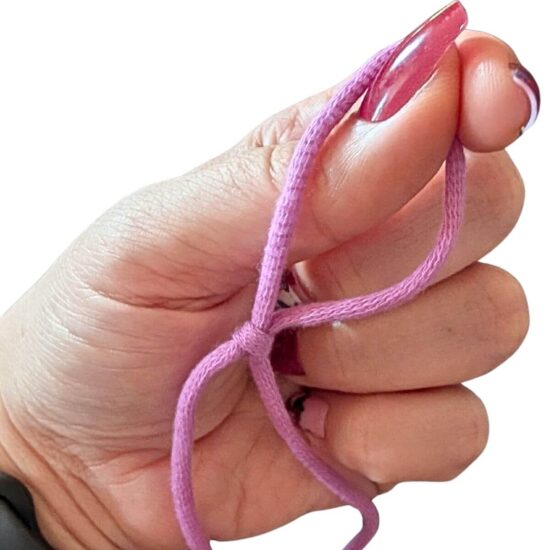
Ta-Da!
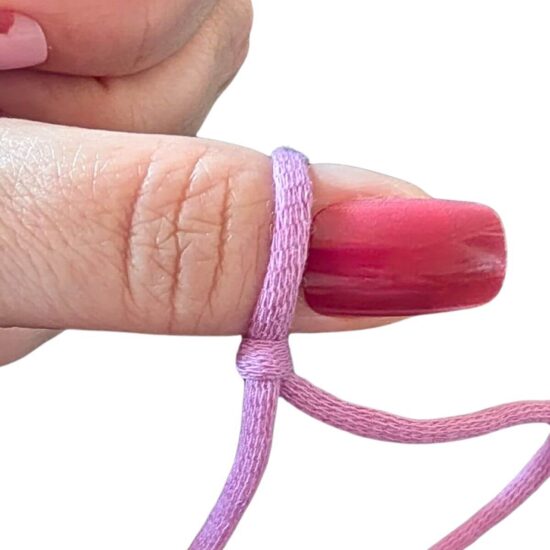
Again, it’s much easier to watch this in the video than to read. Take a look at the video tutorial if you need more help.
Right Handed Video Tutorial – Slip Knot By Hand
If you can’t see this video, try watching it on YouTube HERE.
Left Handed Video Tutorial – Slip Knot By Hand
If you can’t see this video, try watching it on YouTube HERE.
How To Make A Crochet Chain Stitch
The basic instructions for a crochet chain, as is often seen in stitch definitions, is:
Chain (ch): Yo, pull through loop on hook.
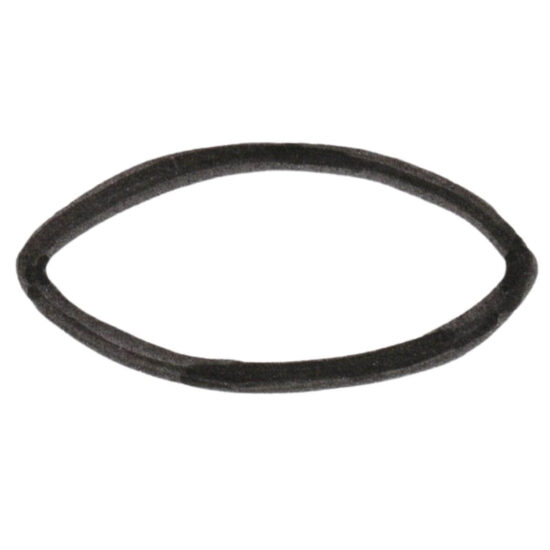
Chart Symbol – Chain (ch)
The image below is the symbol used for a chain in crochet charts. The symbol can be rotated to show which direction the chain is laying.
Step by Step Instructions with Photos – Chain (ch)
To make a chain (ch), start with a slip knot on your hook.
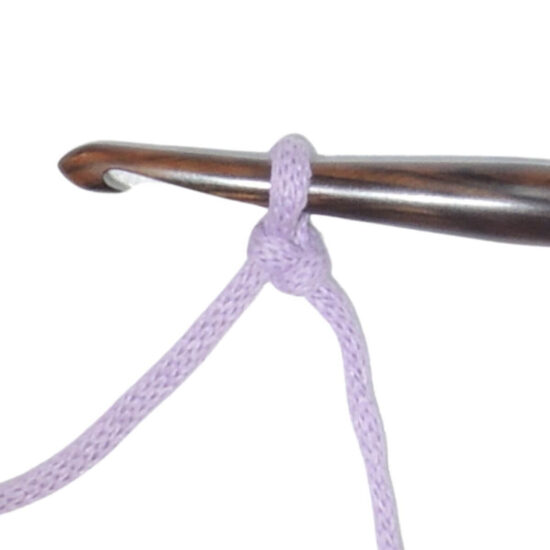
Wrap your yarn around your your non-dominate hand to create tension (see the video.) Next, pinch just below the knot with the middle finger and thumb of your non-dominate hand.
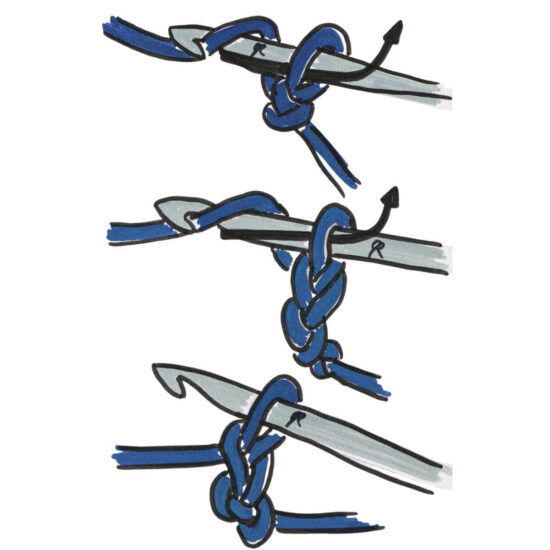
yo – wrap the yarn over the hook, starting behind then hook…
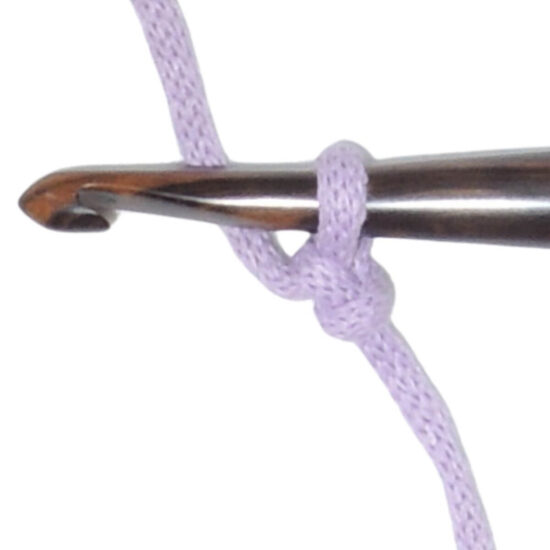
…then over the top, and then under the hook to get the yarn in the back once more
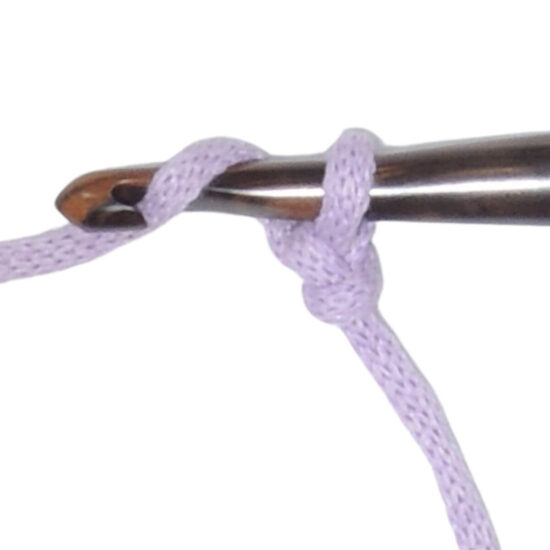
keep the slit in the hook facing down and pull the yo through the loop already on your hook…
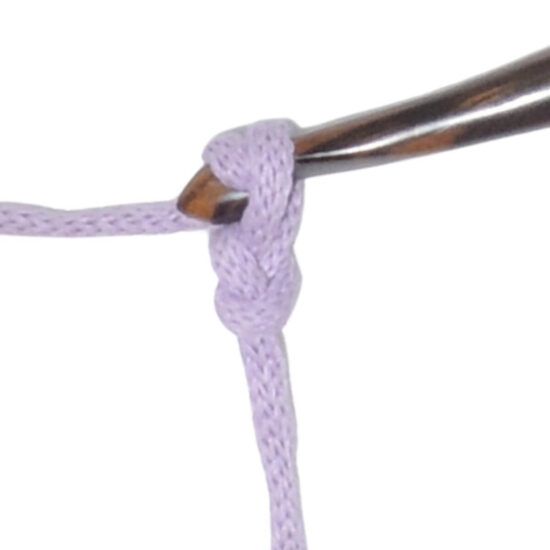
…letting the old loop fall off.
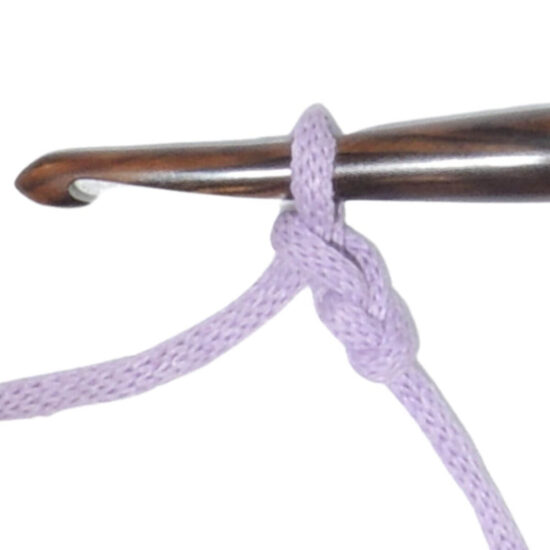
The yo has become your new loop and you have made your first chain stitch.
Now continue making chain stitches by yarning over, then pulling the yo through the loop on the hook.
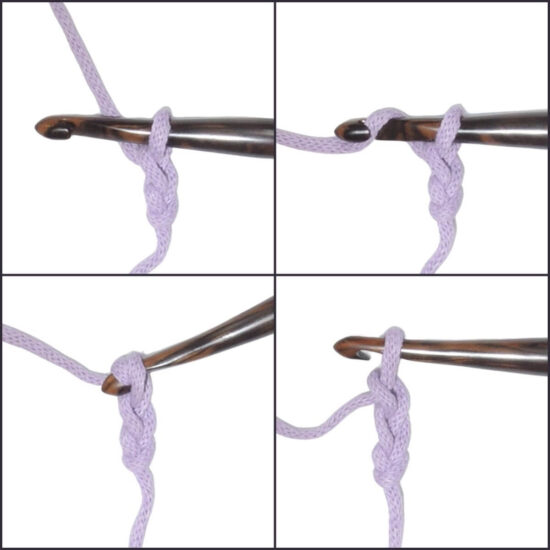
Step by Step Illustrations – Chain (ch)
Right Handed Video Tutorial – Chain (ch)
If you can’t see this video, try watching it on YouTube HERE.
Left Handed Video Tutorial – Chain (ch)
If you can’t see this video, try watching it on YouTube HERE.
Crochet Chain Stitch Anatomy
Now let’s talk about the anatomy of the chain. The side of the chain that you see when you are making it is usually referred to as the top. The chains look like little tears connected to each other. The loops that are facing you are called the front loops, and the loops that are farther from you are called the back loops. You can turn the chain over and see the bottom. There is another set of loops here called the bottom loops, the bottom bumps, or the third loops. Some people will call this set of loops the back bumps, but I find that too easy to confuse with back loops, so I stay away from that term.
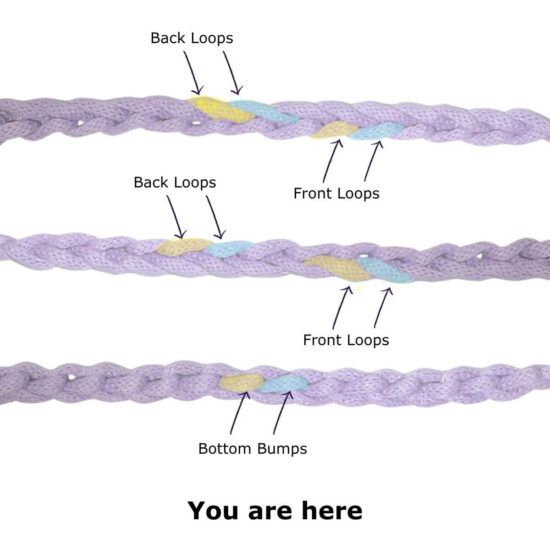
Once you have your foundation chain (a set of chains in which other crochet stitches are worked), it’s time to start stitching into your chains. When you are simply told to crochet into a chain, it is most often assumed you will crochet under the front and back loops and on top of the bottom bump. However, if your pattern does not tell you where to insert your hook, you can insert your hook under any one or two loops/bumps of the chain that you like. I prefer to work my first row or round of stitches in the bottom bumps of the chains so that the little chain or tear-drop part of the stitch lays on the bottom of my stitches. Though with some types of stitches I will change that preference.
FAQs
A foundation chain is the chains used to crochet the first row of stitches, it is the foundation of your work.
A turning chain is a chain or chains used at the start of a row or round in order to get your hook up to the height of taller stitches.
A chain space is a set of one or more chains made in between other stitches, often to create a hole or to help with creating a corner.
A regular chain is just a chain stitch – all of the other items on this list are made with regular chains.
Stitch markers are your friend here. Place a removable stitch marker on the loop of your chain you want at the bottom. So if you’re working into the top 2 loops, place the stitch marker around the bottom bump. Do this every 20 or so stitches.
First, this will help you to not loose count of your chains. Second, it will help with “be careful not to twist.” Lay the chain on the table and use the stitch markers to help see if there are twists and to help weigh down the chain so it doesn’t twist. Once it’s untwisted, carefully mold it into a circle, the join!
Another trick I love is to make the first round as a row, and then join before the second round. Be sure to leave a nice long starting tail when you do this, so you can use it to sew the small opening closed before weaving it in.
No. There are also foundation stitches, which let you crochet the chain and the first row of stitches all at once. These are a little more tricky, but totally worth learning for certain projects.
Did you enjoy what you found here at Jessie At Home? Then sign up for my newsletter and like my Facebook page, so you’ll get all the updates on new tutorials, other posts, sales, and coming events.
If you have any questions, want to share pictures of your work, or just want to chat with Jessie and other crafty individuals, than join one of our free Zoom Sit & Stitches. Find them on our Events Calendar.
© Copyright 2014 Jessie Rayot / Jessie At Home®, LLC All my videos, patterns, charts, photos and posts are my own work, so you may not copy them in any way. If you want to share this information with someone, then share the link to this post.








Look forward to your posts.
I would like to use your videos, directions and pictures in my classroom with my special needs students. I am putting together a proposal for my principal. I really like your site and how you have all the bases covered for different types of learners.
Please email me at [email protected].