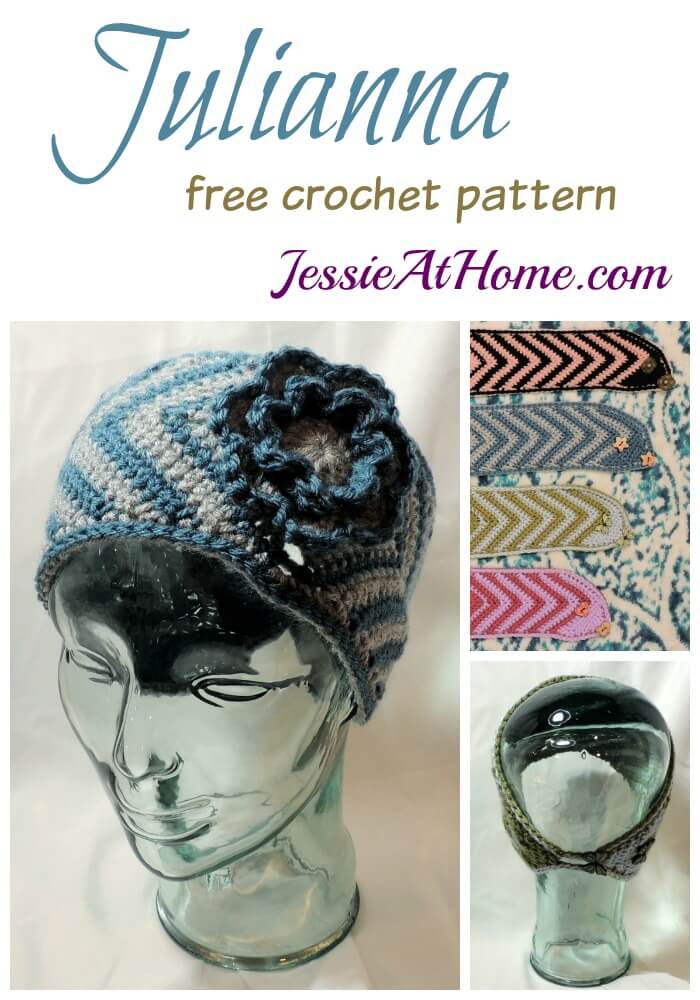
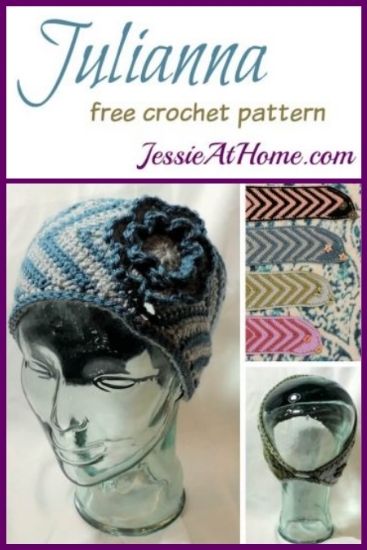
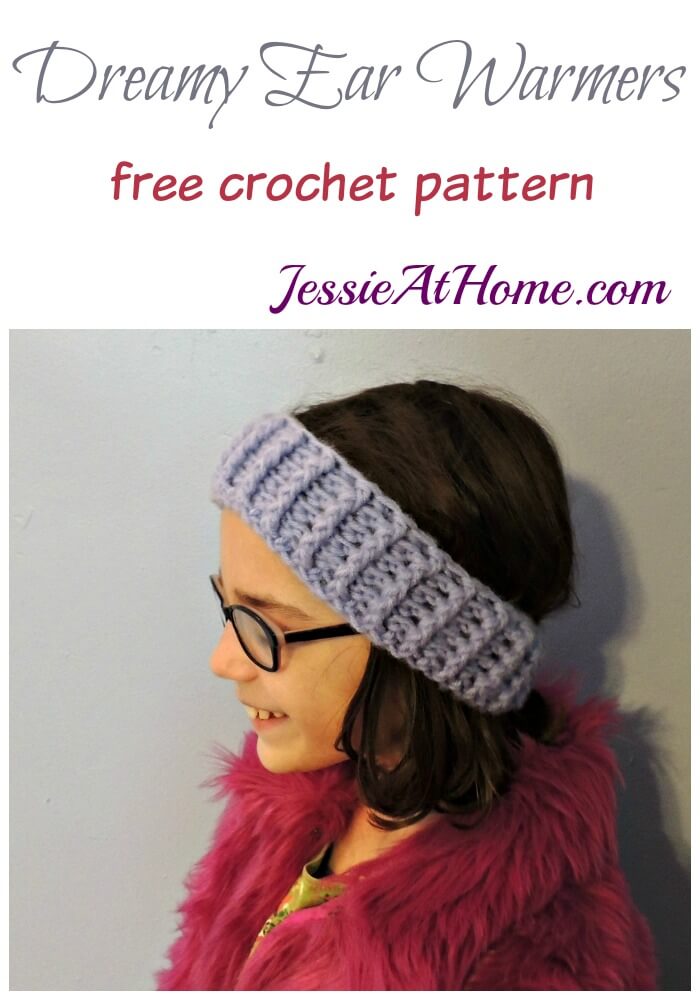
There seems to be a never-ending stream of birthday parties for the littles right now. Julianna was the answer to one of those parties last week. These Granny-inspired ear warmers are just too fun! I even added a flower to make them even more cheery and help warm up those cold days!
I’ve added an adult large size to this pattern for woman with larger heads, drag queens, and so it can be worn over the spectacular up-dos I often see worn by African woman. I mean, just because your hair is fabulous doesn’t mean your ears don’t get cold in winter!

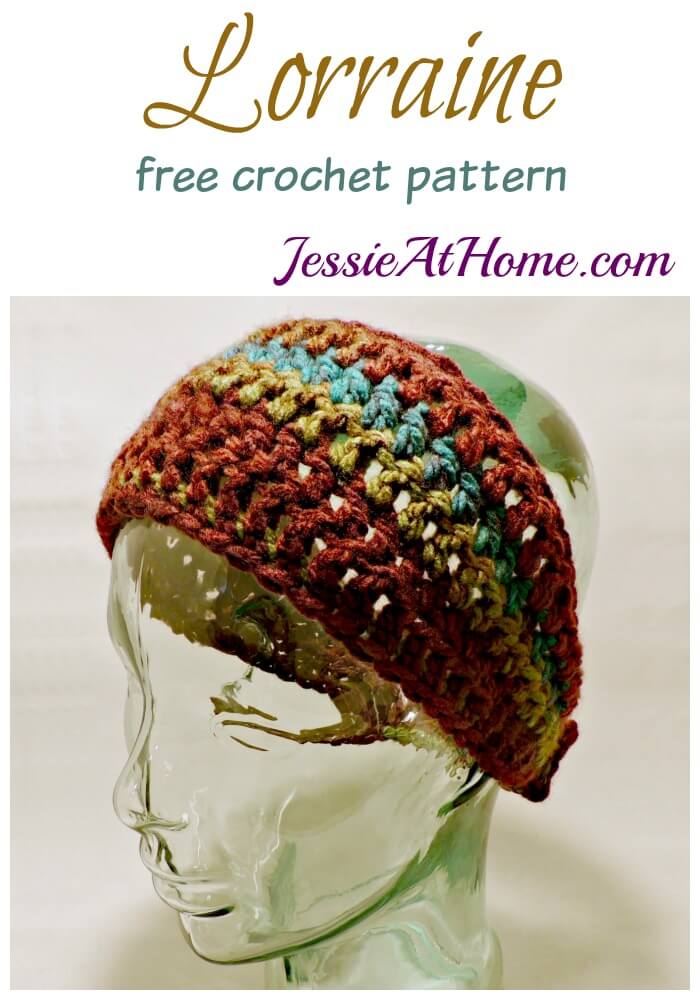
Julianna
Crochet Pattern
Easy Skill Level
Designed by Jessie Rayot
Size:
Toddler (Child, Adult, Adult Large)
Measures: 17 (18.5, 20, 21.5) x 4.5 inches
Yarn:
Lion Brand Vanna’s Choice, 100% Acrylic, worsted weight (size 4), (100 g / 156 m)
Hook:
US-I/9, 5.5 mm
US-J/10, 6.0 mm
Gauge:
16 sts x 10 rows = 4” [10 cm] in 4″ with smaller hook
Other supplies:
yarn needle
2 (two) 3/4 – 1 inch buttons
Stitches and Abbreviations: click on highlighted sts for tutorials
ch – chain
bpdc – back post double crochet
dc – double crochet
dc cl – double crochet cluster
dc2tog – double crochet 2 together
fpdc – front post double crochet
hdc – half double crochet
sc – single crochet
sl st – slip stitch
sp(s) – space(s)
st(s) – stitch(es)
Getting Started:
When switching colors, switch at last step of last stitch of previous color.
Pattern:
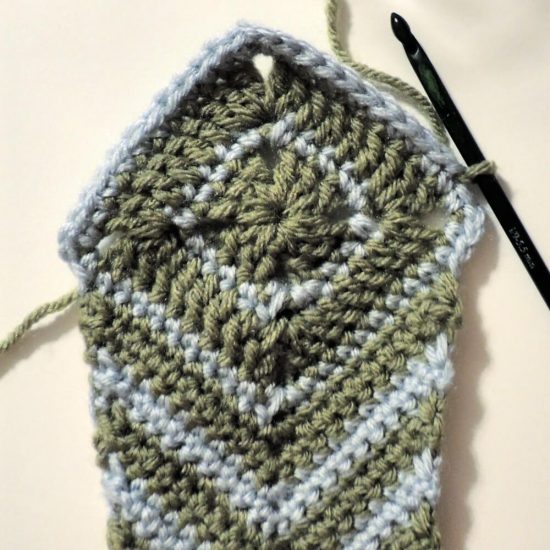
Square: Change Color every Round
Rnd 1: Ch 3, sl st in first ch made to form a ring, ch 5 (counts as first dc and ch 2 here and throughout), [3 dc in ring, ch 2] 3 times, 2 dc in ring, sl st in 3rd ch of beginning ch-5, sl st into ch-2 sp. – {12 dc}
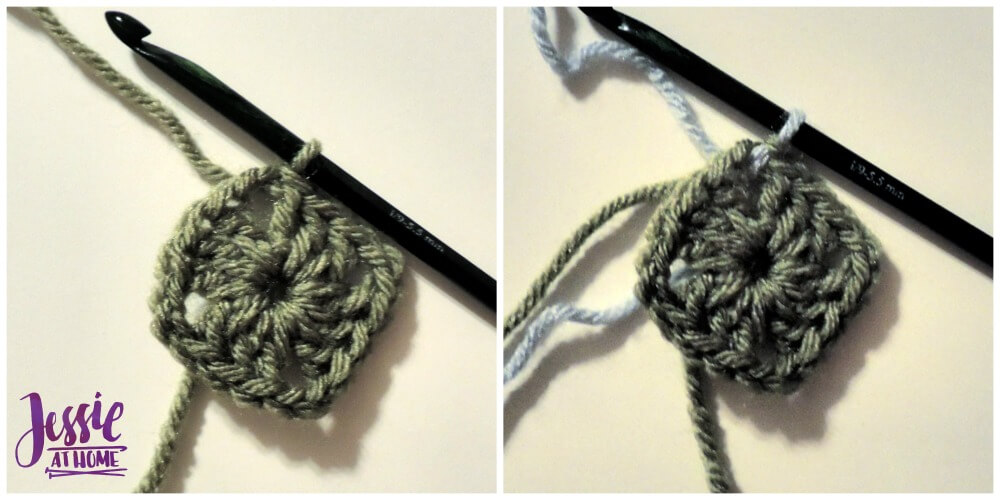
Rnd 2: Ch 1 (does not count as a st here or throughout), [(sc, ch 2, sc) in ch-2 sp, sc in each of next 3 sts] 4 times, sl st in top of first sc, sl st in ch 2 sp. – {20 sc}
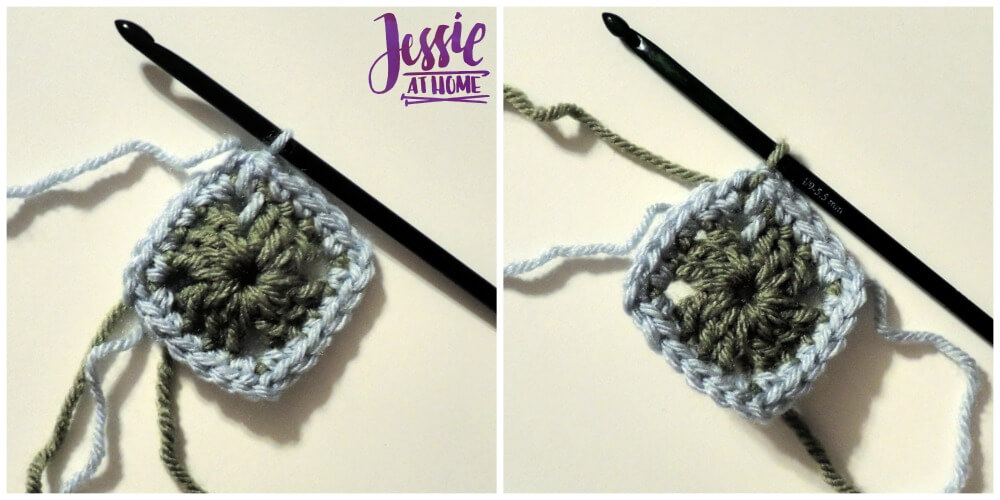
Rnd 3: Ch 5, 2 dc in ch-2 sp, [dc in each of next 5 sts, (2 dc, ch 2, 2 dc) in ch-2 sp] 3 times, dc in each of next 5 sts, dc in ch-2 sp, sl st to 3rd ch of beginning ch-5, sl st in ch-2 sp. – {36 dc}
Rnd 4: Ch 1, [(sc, ch 2, sc) in ch-2 sp, sc in each of next 9 sts] 4 times, sl st in top of first sc, sl st in ch 2 sp. – {44 sc}
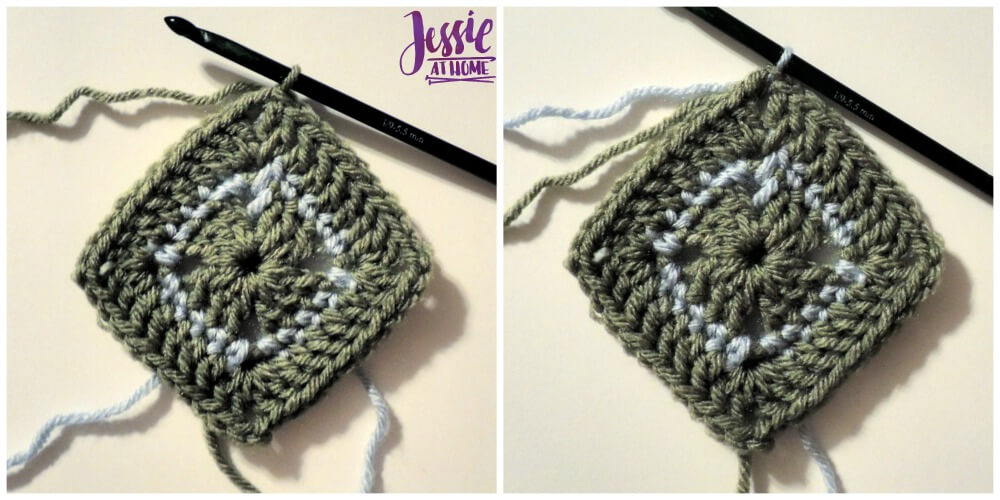
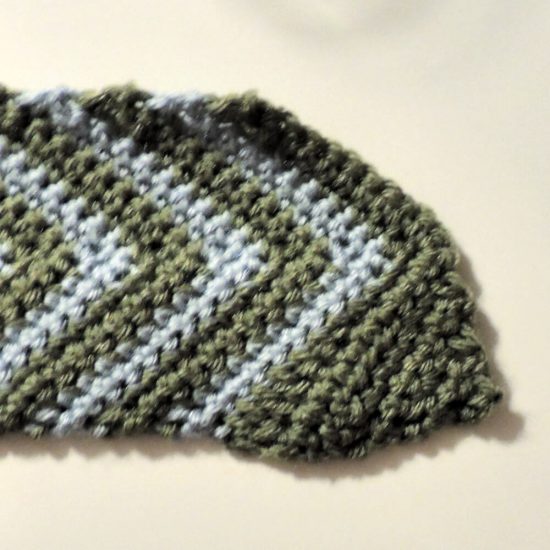
Fasten off and weave in all ends. Square should measure 3 1/2″ along each side.
First Side: Change Color every other Row
Row 1 (Right Side): Attach yarn to 2nd dc from ch-2 corner on any side, ch 1 (does not count as a st here or throughout), sc2tog, sc in each of next 8 sts, 3 sc in ch-2 sp, sc in each of next 8 sts, sc2tog. – {21 sc}

Row 2: Turn, ch 1, sc2tog, sc in each of next 8 sts, 3 sc in next st, sc in each of next 8 sts, sc2tog.
Repeat Row 2 until there are a total of 18 (22, 26, 30) rows on first side.
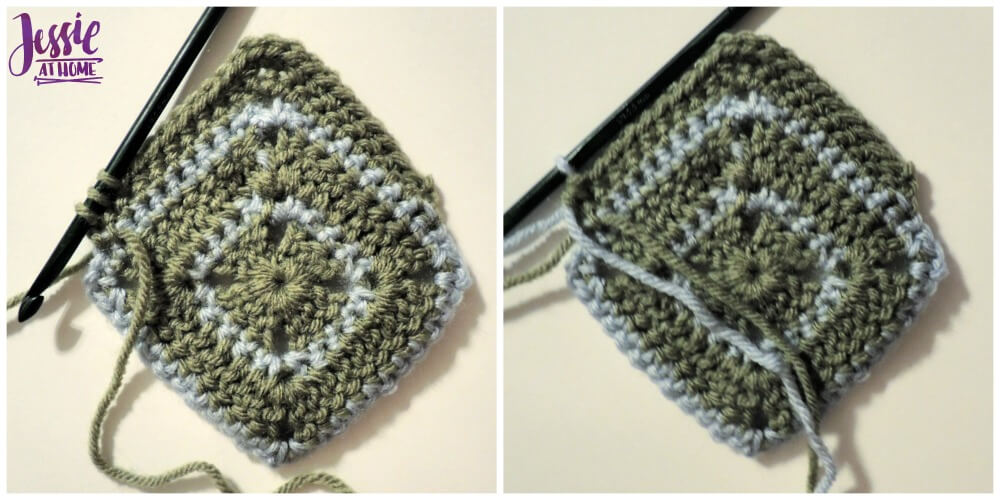
First Side End: Change Color before Row 1 only
Row 1: Turn, ch 2 (does not count as a st here or throughout), dc2tog, dc in each of next 2 sts, hdc in each of next 3 sts, sc in each of next 3 sts, 3 sc in next st, sc in each of next 8 sts, sc2tog.
Row 2: Turn, ch 1, sc2tog, sc in each of next 8 sts, 3 sc in next st, sc in each of next 3 sts, hdc in each of next 3 sts, dc in each of next 2 sts, d2tog.
Row 3: Turn, ch 1, sc2tog, sc in each of next 6 sts, sc2tog. – {8 sts}
Row 4: Turn, ch 1, sc2tog, sc in each of next 4 sts, sc2tog. – {6 sts}
Row 5: Turn, ch 1, sc2tog, sc in each of next 2 sts, sc2tog. – {4 sts}
Row 6: Turn, ch 1, sc2tog, sc2tog. – {2 sts}
Row 7: Turn, ch 1, sc2tog. – {1 st}
Fasten off and weave in ends.
Second Side: Change Color ever other Row through Row 13.
Hold piece so original square is at the top and first side is at the bottom, begin working from ch-2 corner on the right of the square.
Row 1 (Right Side): Attach yarn to 2nd dc from ch-2 corner, ch 1 (does not count as a st here or throughout), sc2tog, sc in each of next 8 sts, 3 sc in ch-2 sp, sc in each of next 8 sts, sc2tog. – {21 sc}Row 2: Turn, ch 1, sc2tog, sc in each of next 8 sts, 3 sc in next st, sc in each of next 8 sts, sc2tog.
Rows 3-12: Repeat Row 2.
Row 13: Turn, ch 1, sc2tog, sc in each of next 8 sts, 3 sc in next st, sc in each of next 3 sts, hdc in each of next 3 sts, dc in each of next 2 sts, dc2tog.
Row 14: Turn, ch 2, dc2tog, dc in each of next 2 sts, hdc in each of next 3 sts, sc in each of next 3 sts, 3 sc in next st, sc in each of next 8 sts, sc2tog.
Row 15: Turn, sl st in second st and each of next 9 sts, ch 1, sc2tog, sc in each of next 6 sts, sc2tog. – {8 sts}
Row 16: Turn, ch 1, sc2tog, sc in each of next 4 sts, sc2tog. – {6 sts}
Row 17: Turn, ch 1, sc2tog, sc in each of next 2 sts, sc2tog. – {4 sts}
Row 18: Turn, ch 1, sc2tog, sc2tog. – {2 sts}
Row 19: Turn, ch 1, sc2tog. – {1 st}
Do not cut yarn.
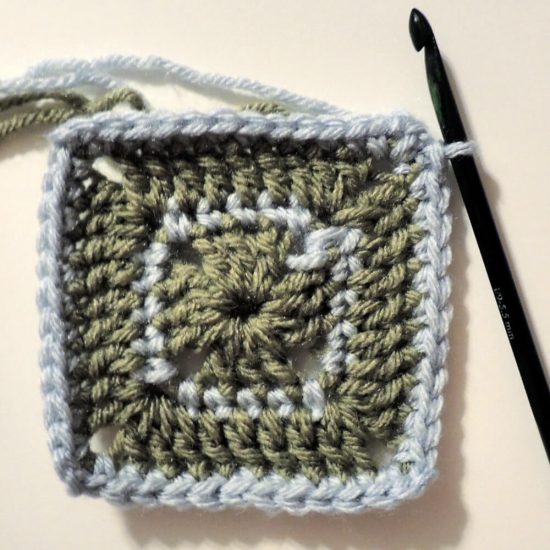
Border and Button Loop
Rnd 1 (Right Side): Ch1, sc around entire piece, sl st to beginning sc, ch 10, sl st to top of first sc.
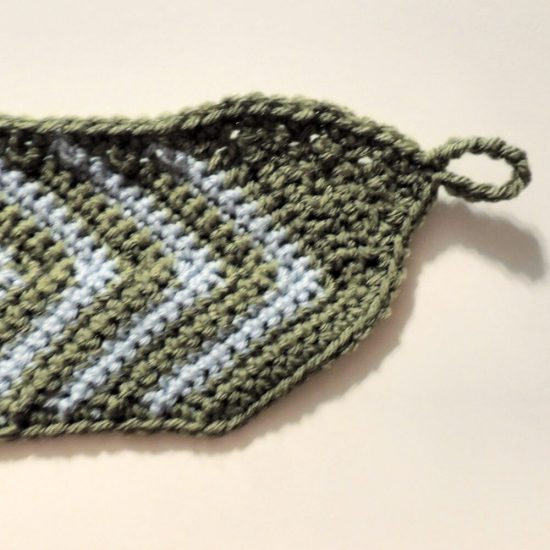
Fasten off Color used for Rnd 1 and weave in ends.
Rnd 2: Using larger hook, join next Color to first sc of Rnd 1 and loosly sl st in each sc around, sl st in each ch.
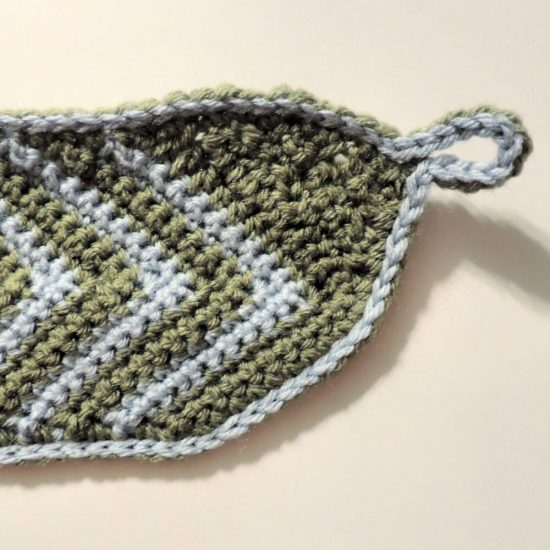
Fasten off and weave in all ends.
Sew on two buttons.
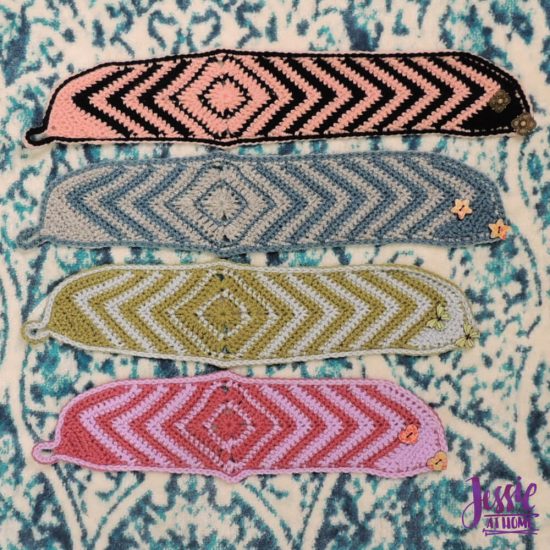
Wear as is or add a flower or other decor to the center of the square.
Wear or give and enjoy!


If you enjoy this free crochet pattern, please consider buying some of your supplies from one of these affiliate links. Thank you.
Did you enjoy what you found here at Jessie At Home? Then sign up for my newsletter and like my Facebook page, so you’ll get all the updates on new tutorials, other posts, sales, and coming events.
If you have any questions, want to share pictures of your work, or just want to chat with Jessie and other crafty individuals, than join my Facebook group.

© Copyright 2013 Jessie Rayot / Jessie At Home All my videos, patterns, charts, photos and posts are my own work, so you may not copy them in any way. If you want to share this information with someone, then share the link to this post. If you want to share on your own blog / website, then you may use the first photo in this post and link back to this post. Also, you may not give away printed copies of this post.


Hi Jessie! I absolutely love this idea! Is there a way to get this in printed form for an adult size? I tried clicking on the link but all it gave me was pictures. Thank you! Nikki
If you click on the link just above my signature (here it is again) it will bring you to the Craftsy listing. If you do not have a Craftsy profile, you will have to sign up, but it is free. From the Craftsy listing you can download the printer friendly version of the pattern. I believe you have to put the pattern in your cart and check out, but the pattern is free.
That worked, thank you so much! What size is that pattern for? Do I need to adjust for an adult? Thanks again – football in the snow tonight so this is perfect timing lol.
It’s the same pattern as the one here, so child and adult. Just use the second size and you should be good as long as your gauge is good.
I’m sorry, I’m not seeing the other sizes. What am I missing? It looks like the child & adult should be in () with the child in bold, but I’m not seeing that, just stitches in (). I feel like an airhead lol.
Oh, dear!!! I can’t believe no one has caught this before! I wrote this pattern in the child size, then adjusted it for toddler and adult. It appears as though I published the unsized (child) version. I have fixed it now. Basically, it is now written for the adult size, and it tells you which rows to skip for child and toddler sizes. I am so sorry about that!
No worries (at least I’m not crazy – haha!). Thank you so much! Getting ready to leave for the game and I should have just enough time to get it done on the way. Thank you, have a great evening! 🙂
I want to thank you for sharing. You are making my grasnddaughters very happy. You are a very talented person. God bless you.LOVe
Thank you! I am so glad to help make your granddaughters happy. Feel free to share some photos on my Facebook page!
what does this abbreviation mean: sc2tog ?
Single Crochet 2 Together ~ you can find directions and a video here.
Hi Jessie,
I am in the process if making this beautiful earwarmer and am stuck at row 19. I’m wanting to know if I am still working on the first side of the wrap, or should I move to a different side/corner of the granny square. and if i sm still working on the first dide of the wrap the part in the directions where it says to sc 3 times in Ch sp confuses me because there is no Ch sp.
Then skipping down to the directions after row 24. “Flip to wrong side, reattach first color”. Is this on a new side/corner of the granny square?
Thanks so much. I’m really loving the pattern and the way it looks. I’m making mine solid cream and it’s beautiful.
Jamie
Row 19 is still working on the same side of the ear warmers. I fixed the ch sp. Originally I made the corners with a ch, but changed the pattern and I must have missed that one.
Row 24 is the end of that side of the ear warmers. After that you start the other side of the ear warmers.
Hi I’m on round 2. I’m not sure if I am suppose to sc into the chain or the dc I worked (I’m new to crochet :-))
First you sl st into the ch space, then you ch3, then sc in the same ch sp, then you sc into each of the next 3 dc, and keep going. Does that help any?
after the square is complete
Row 2
sc in next 9 sts
or is it supposed to be dc?
Nope, it is sc. Look at the pictures, they should help a bit. 🙂
this is cute, will have to make for my grand daughter.
What is the gauge for this ear warmer? Thanks so much. Very cute!
12 sc and 15 rows in a 4″ square. Sorry about that!
Just liked your pattern for the headband looks like something I would like to try.
Thanks
So I love your pattern. I’m having trouble though. I’m using caron simply soft. It’s a worsted weight 4. I followed the directions for the adult But it just covered my forehead.
Help!
Caron SS is a light worsted, it is smaller than the Vanna’s choice that I used. That will give you a smaller gauge which will give you a smaller item. You can add more of the chevron stripes to make it longer, or you can use a heavier worsted and/or a larger hook.
Thanks. I will add rows until it’s sized for my head. Do you want my added rows for notes?
No thanks. It’s an easy enough adjustment.