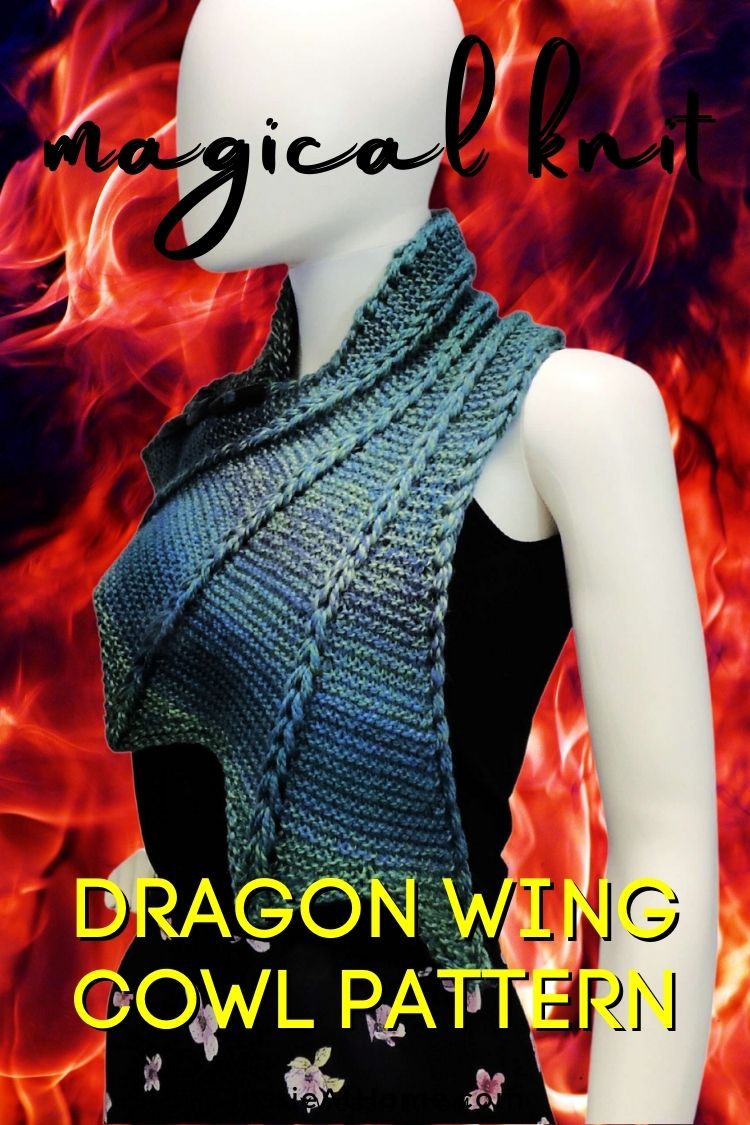
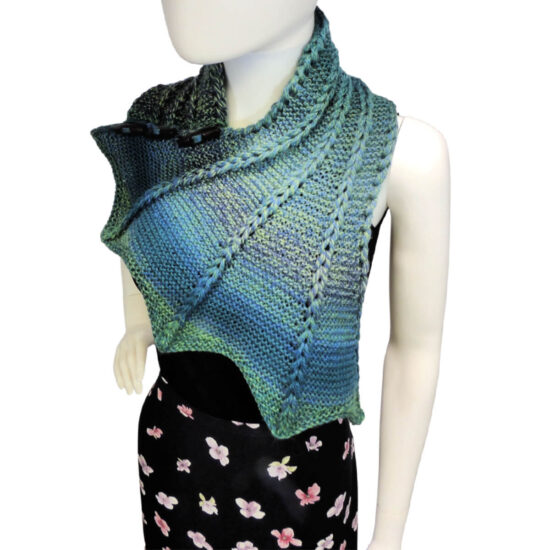
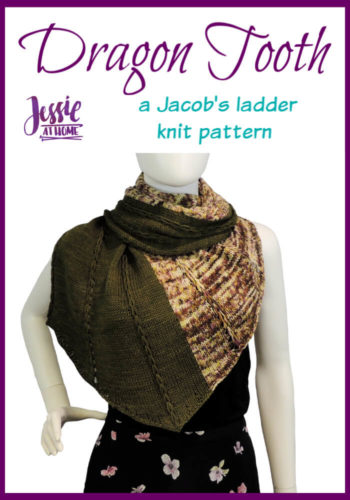
The Dragon Wing Cowl knit pattern uses my knit Jacob’s ladder technique to create fun ridges, and simple increases to give it shape and texture.
The yarn for this design was provided by Knit Picks / WeCrochet. All opinions are my own.
This pattern was originally published on October 1, 2015. The most recent update was made on January 15, 2021.
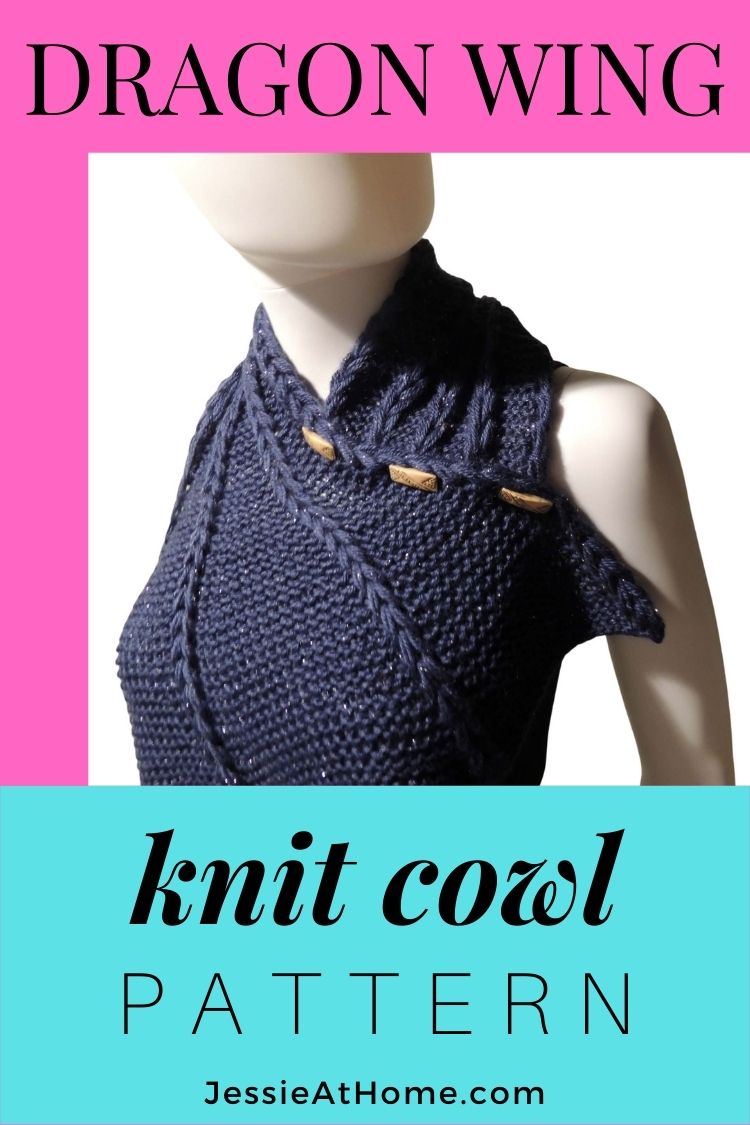
Wondering where I got such a nifty pattern idea? I inspired by the way the Dropped and Found scarf was draped in one of the photos. I loved the look and wanted to make another cowl pattern that had the same shape without having to be styled that way.
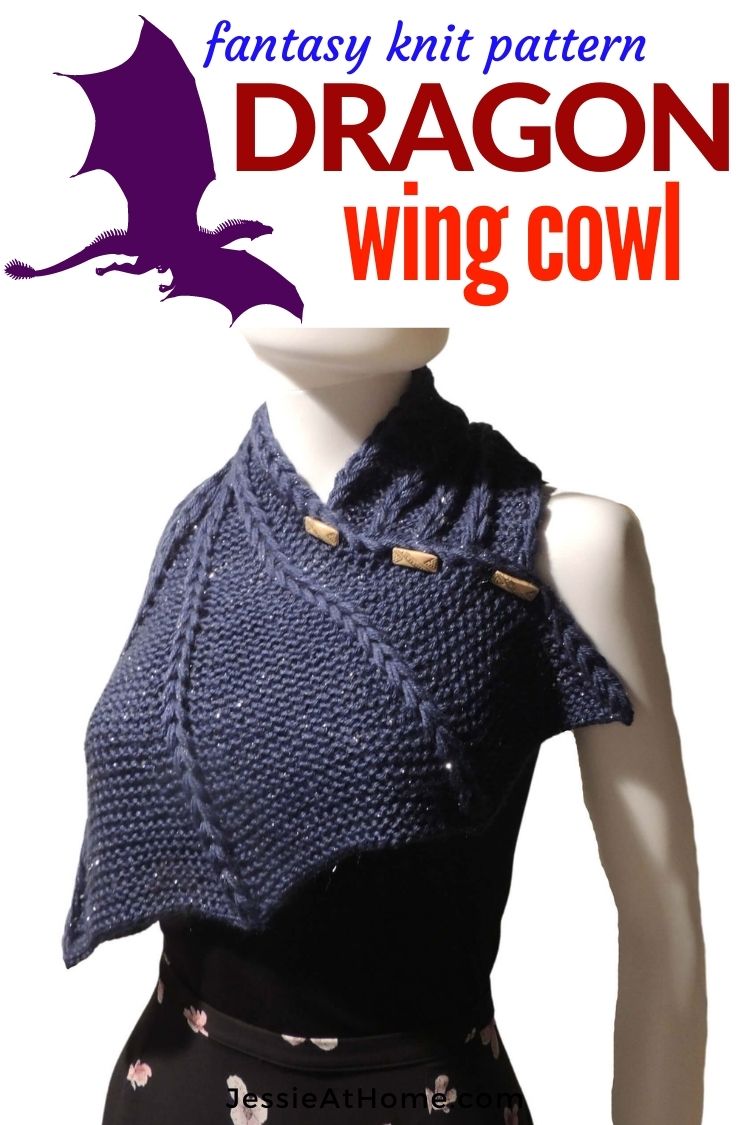
Before you freak out because the stitch pattern or this knitted cowl looks too hard, know that I’ve set you up for success. I know the dropped stitches can be scary. Just follow a few simple guidelines and your knit Dragon Wing Cowl will be epic.
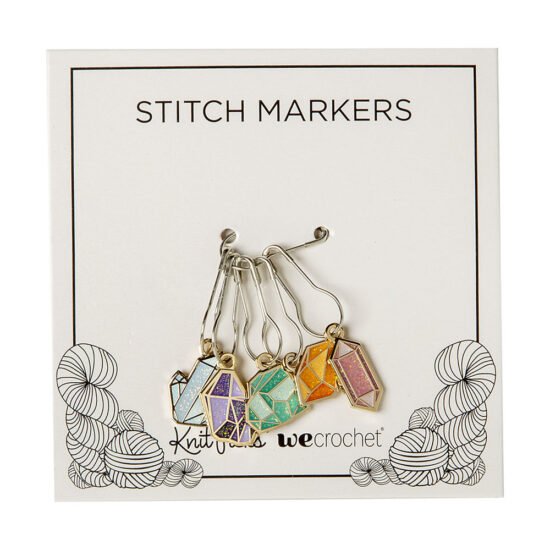
- Use stitch markers, I tell you were to place them, and they will save you from having stitches that don’t drop.
- Do not drop the stitches until the pattern says to.
- If you get stuck, check out the video tutorial.
While I would not qualify this as a pattern for beginner knitters. However, if you take your time and use the video tutorial along with the pattern, adventurous beginners can succeed!
ETA: I had many requests for a crochet version, so here it is.
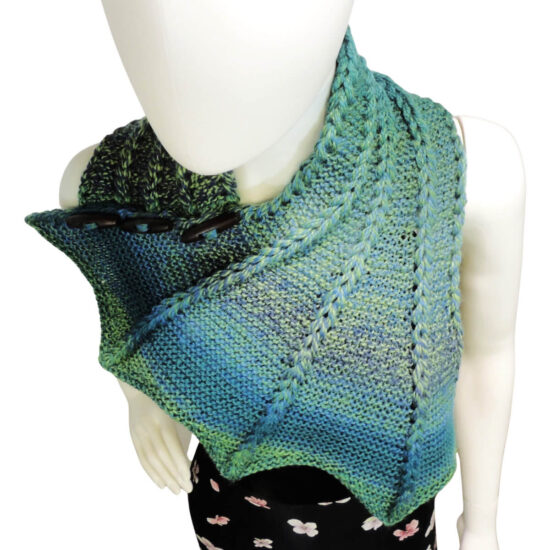
Dragon Wing Cowl
A Jacob’s Ladder Knit Pattern
Intermediate Skill Level
Designed by Jessie Rayot
Stats & Supplies
Size
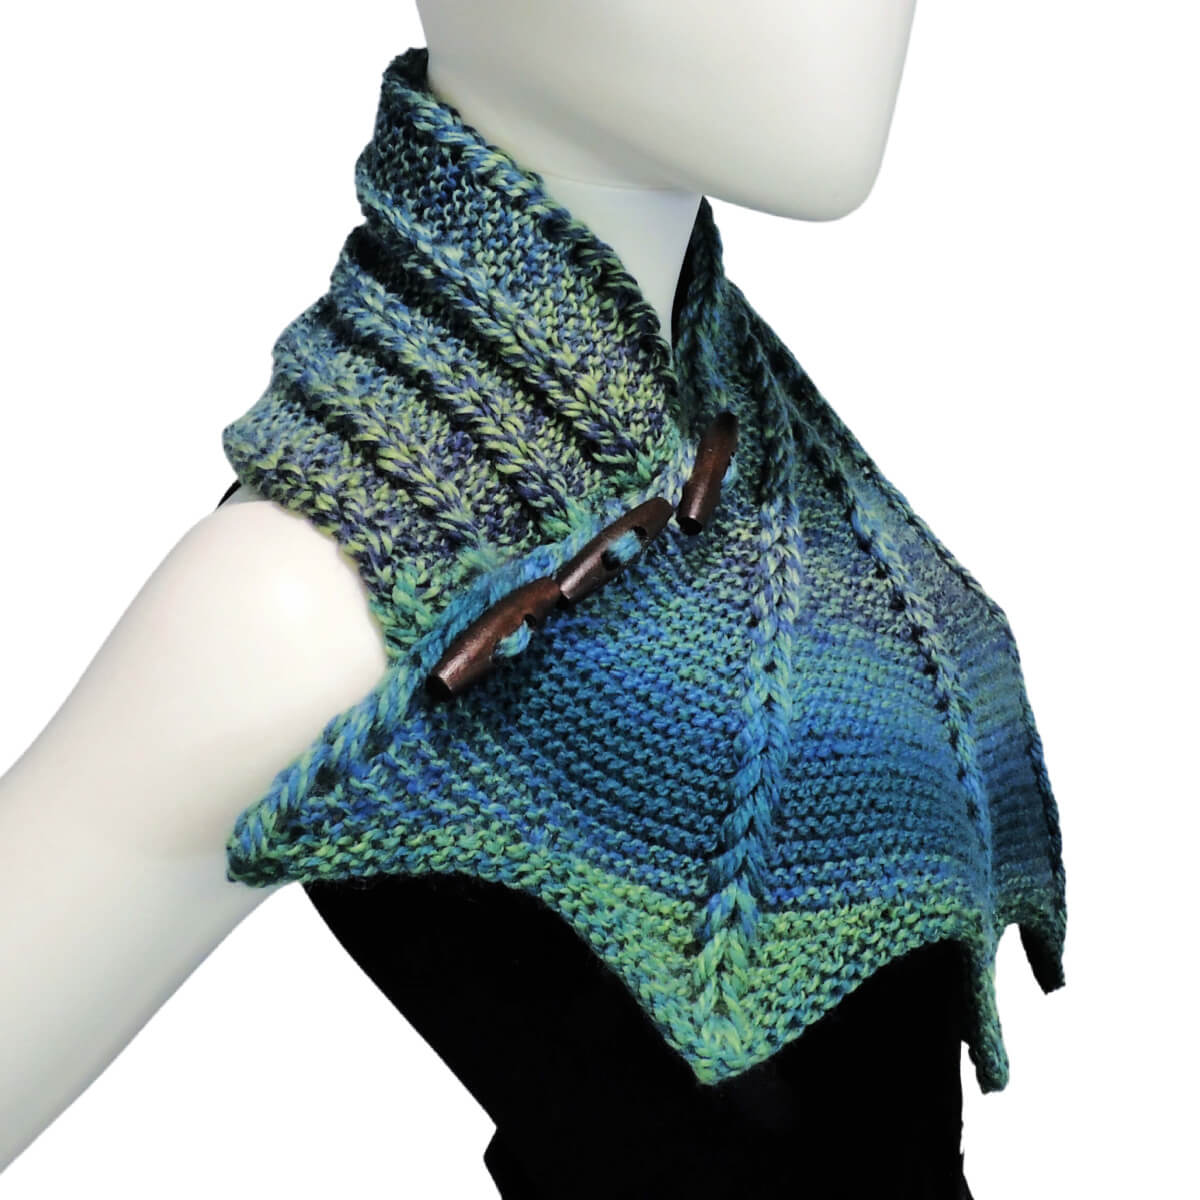
22” x 30”
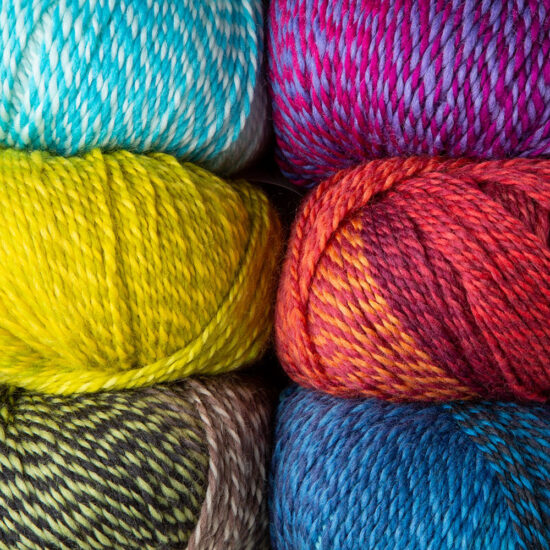
Yarn
Knit Picks / WeCrochet Chroma Twist: (70% Superwash Wool, 30% Nylon), Yarn Weight / Size 4 (Worsted), 198 yds / 100 g (yds/g = 1.98)
Fathoms 28507: 2 skeins, 240 yds / 120 g)
NOTE: There are long sections of dropped stitches, so it’s important to use a yarn that isn’t too fuzzy/grabby. It can become very tedious trying to drop the stitches if the yard doesn’t want to let go.
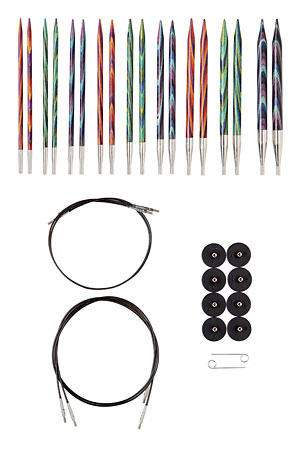
Knitting Needles
I used circular knitting needles as I feel more comfortable with them. You could start with straights, and probably finish the whole cowl with long straights. Still I would recommend making at least from the increase section on with 24″ or longer circular needles so that your stitches don’t bunch up too much.
Gauge
Learn about gauge HERE
19 sts x 34 rows = 4” [10 cm] in garter stitch after blocking
Other Supplies
Yarn Needle
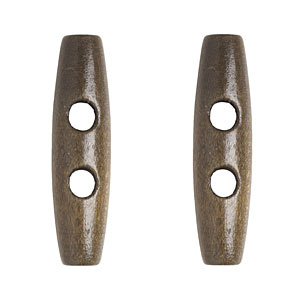
3 Buttons or Toggles
10 Stitch Markers
Stitches and Abbreviations
click on highlighted sts for tutorials
bo – bind off
co – cast on
k – knit
k2tog – knit 2 together
kfb – knit front and back
pm – place marker
sm – slip marker
st(s) – stitch(es)
w&t – wrap and turn
yo – yarn over
[ ] – work step in brackets number of times indicated
Get the Ad-Free Printable PDF at These Sites
- Showstopper Creations (that’s me!)
- Ravelry
- Etsy
- LoveCrafts
Once upon a time this was a free knitting pattern. I have updated it, added shaping to the points, and put a lot more time into it. Now this is a premium, for sale only pattern. The video tutorial I created is free, though you will need the pattern as well to complete your knitting project.
Video Tutorials
You can find the 3 part video tutorials for this stunning, cozy cowl HERE and from the link below.
Get the ad-free, printer-friendly PDF pattern from the link below.
If you are going to make the Dragon Wing Cowl, then get some supplies from these affiliate links. You pay the same price, and I get a small referral fee.
Did you enjoy what you found here at Jessie At Home? Then sign up for my newsletter and like my Facebook page, so you’ll get all the updates on new tutorials, other posts, sales, and coming events.
If you have any questions, want to share pictures of your work, or just want to chat with Jessie and other crafty individuals, than join my Facebook group.

© Copyright 2015 Jessie Rayot / Jessie At Home LLC All my videos, patterns, charts, photos and posts are my own work, so you may not copy them in any way. If you want to share this information with someone, then share the link to this post. If you want to share on your own blog / website, then you may use the first photo in this post and link back to this post. Also, you may not give away printed copies of this post.


O ! M! G! That is gorgeous – I am definitely going to make that just as soon as I find a yarn worthy of such a beautiful design!
Thank you! The Red Heart Sparkle Soft is very affordable, and looks great.
Jessie, I love this cowl!!! So much that I went to the store to buy the right size knitting needles because all I have are sets of 7, 10, 10 1/2, and 13. I already had an extra skein of RH Soft in black so that was great. Only trouble now is that I’ve done my swatch and it is far from right. My 31sts x 19 rows = 6″ x 2.25″. How can I fix this?
Thanks a million!
Amberly
I had a rather big typo in the gauge swatch. It was backwards!! I fixed it, and I actually put in the after blocking gauge because you tend to get more accurate results that way, but the preblocking gauge should be 18 or 19 sts by 31 rows.
Thank you Jessie for clearing that up. I was feeling a bit disappointed in myself. I thought I’d have to search for a new weekend project.
No problem! Thanks for asking. I always prefer you ask before giving up, after all, sometimes I make mistakes. 🙂
PLEASE tell me there’s a crochet version of this pattern?!
There will be. Keep checking back. You can also sign up for email alerts of new posts on the top right of this site.
Yay! Although I am considering learning how to knit just to make this cowl. It is beautiful!
Well, now you can make one in knit and one in crochet!!
I’m just teaching myself to knit and my daughter is begging for one of these! I have a couple of questions. Is one skein of the yarn enough? About 200 yards of worsted weight? Do you use circular needles and if so, what length?
One skein of the suggested yarn is enough ~ the details should be at the top of the pattern. I used circulars because I pretty much use them for everything. I think I used 24″, but 16″ or anything longer is just fine.
coolest project ever!!!! i’ll be heading out today to find the red heart yarn. Can’t wait to make! <3
This is so pretty! I kind of want to do it with the drop stitches in an accent color instead of all one color. Do you think it’s possible? I’m still a bit of a novice so I’m not sure.
It’s possible, if you twist it right, but it’s a LOT of work, and a lot of separate skeins of yarn.
If you knit the whole thing without doing the drop stitches, then crochet a slip stitch in a chunky yarn of your choice, you could get a similar effect. it would just be a bit wider than the one shown (since you aren’t crocheting the dropped stitches.) Hmmm…I might have to try this myself!
I’m still having some trouble with making the loops. What size crochet hook do you recommend using? At the moment I’m using a 4.5 mm crochet hook since that’s all I have on hand, but I feel like it’s not big enough.
I think I used a K or an M/N. Your hook may be a little small, so that will make it difficult to catch all the strands.
This is so awesomeeeeeee but I am a complete beginner at knitting…would you be so kind as to post a video on this?
There is a video linked in the post that will show you a lot of what you need to know.
Wow! Looks so awesome! Looks like it could be the top of a cool top/sweater too, if you ever feel like making a pattern for that: I’m interested!!
Hi Jessie,
I am getting into knitting and absolutely love this cowl! This is a little too advanced for me but I know someone who would love this as well. Do you ever sell the finished projects? If so I would love to buy one!!!
I don’t make them to order. However, it’s easier than it looks, if you have a knitting friend, maybe you can get a little help. Or, you can join the facebook group I linked in the pattern and you can try it and share pictures as you go. Then just ask if you get stumped, there is usually someone around who can help (often times it’s me), and if you ask and no one answers after a few hours, you can tag me and I’ll answer the next time I’m in the group.
Hi Jessie,
This is by far the most interesting neck warmer pattern I’ve found and I would like to try to make it.
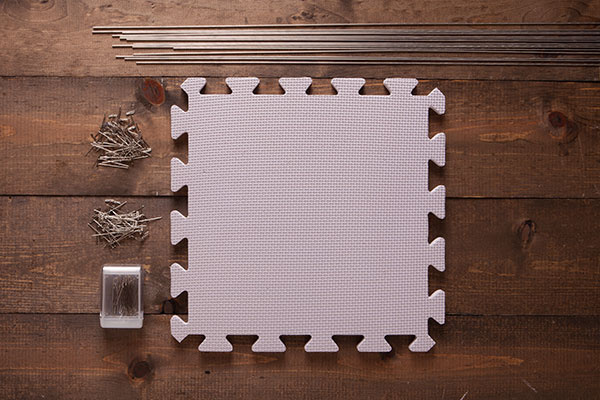
I am not an experience knitter and not quite sure what blocking means and how it effects the work.
I do have a yard in mind for this project, according to instructions, 4mm-6mm needles can be used on it.
Using a 4.5mm needles I achieved 16 stiches over 21 rows gauge (again, not sure how blocking fits here).
Is this yarn too thick? Or can I adjust the pattern somehow to it? If i use much smaller number needle I believe my project will be just be too stiff.
Would love your thoughts on this.
Thank you,
If you look up blocking knitting on YouTube you will find many suggestions. For this project, I recommend laying the item face down on a pinnable surface and pinning it down, gently stretched. Then take a steam item, and HOVER (do not touch the yarn) over the item. You don’t want to soak it, just lightly steam it. Let it cool down and dry for 24 hours. When you remove the pins, it will maintain it’s shape.
As for the gauge, a different gauge will change the size of the cowl. I can’t speak to how the cowl will look in different yarn and different gauge because there are just too many factors. Your best bet is to make a swatch and decide what you think.
Hi Jessie and thank you for the reply.
I decided to go with a different yarn. It alternates between gray blue and black and has a metallic shine to it. Should look awesome with your pattern!
I wasn’t able to achieve the gauge and at the end i decided to narrow by casting 31 stitches instead of 35. The length will be easier to control as I could stop and finish whenever I reach the size I want.
As for adjusting the pattern, do you have any ideas of how could I avoid from dropping the wrong stitches, as in the stitches with the increase? So far I was thinking of doing K10 instead of K12 starting row 117. That would make 2 stitches less at the beginning and the end of each row. Not too sure how to make the proper adjustment from row 132 and on. Any ideas?
Thank you!
Alona,
I didn’t really write the pattern in a way that makes it easy to adjust the starting cast on. There are only 2 sts before the first dropped sts, and after the last, so if you omit the first and last 2 sts on every row, the pattern will not work. I’m sorry, but I would have to write an entirely new pattern to remove 4 sts. You can ether go down a needle size, or have a wider cowl.
Hi there! I successfully made this cowl and it is beautiful so decided to make another. I’ve run into a strange issue on the second cowl- when I start pulling down the dropped stitches one or two of them “disappear” and the run becomes too small to do the chains. I’ve gone back to figure out where those bloody dropped stitches have gone to no avail…does anyone have an idea about how to find them to make the run wider? Sheesh.
If you put an increase in the wrong place, or you dropped the wrong sts, that could be it. However, I know that I had the problem with one of my runs, and upon close inspection I found the stitch that had stopped dropping. The fuzz of the yarn had caused it to snag, so I had to pick at it with a yarn needle to loosen the snag, then it dropped and all was well.
I finished my cowl. It is beautiful! but it is too small. I swear the gauge was right on. I used Paton’s Classic Wool which is also a medium weight. I used Size 13US needle. I know that seems big but I always have to use larger needles to get the gauge. I’m super disappointed that it came out so small. I’ve not done much with blocking but even if I did steam it and stretch it out a bit, I still don’t think it would be big enough. The length of it is not enough to really make it all the way around and the wing does not cover even close to what I see in the picture. I’m 5’10” and have broad shoulders. Do I have this all wrong or do I just really need to move up to a chunky weight yarn to get it the size needed to fit a big person?
I measured my finished piece. It is about 7″ wide at the small end, 20″ wide at the wide end, and 22″ long. I’m not sure how to get it longer and wider at the ends without it getting super wide at the start. I’m open for suggestions! Like I said, it is a beautiful cowl, I’m going to tuck it away for my daughter some day.
Did you check the gauge to make sure you had it? From what you said, it sounds like you think you had gauge, but you didn’t check. So it sounds to me like you didn’t get gauge. Plus, different yarns react differently to blocking. The yarn I used tends to get a bit bigger, whereas a shrinkable wool could actually tighten up a bit if you blocked it with too much heat. My suggestions would be to make sure you have gauge by making a swatch, and to make the beginning longer before you start the increases so you know it will wrap longer. Just be sure to add a multiple of 4 rows. Also, if you make a yarn substitution, know it will act differently from the suggested yarn.
mine came out very, very small…..even when I go to block it, it is so small and won’t fit over my 14 year old. All my stitches were counted properly. Can’t figure out what I did wrong! Tempted to rip it and start over….
Did you check your gauge? Did you check the measurements listed to be sure it would fit in the first place? These are the 2 most common mistakes. You can make it longer by making more rows before the increases start, make sure to make them in multiples of 4. If you don’t want to pull back that far, you can pick up the sts from the cast on and make it longer from the bottom.
Mine also came out extremely small. I’m tiny and it won’t fit me. I plan on just taking out my bind off and trying to add more rows on that end as it didn’t get wide enough either. I tripled checked my gauge, rows, and stitches repeatedly throughout the whole project and followed the instructions down to the dots on the ‘I’s, but it just didn’t reach the expected measurements. I’m assuming the yarn I used didn’t take to the chains well? I’m going to attempt a few fixes and see if I can get it to where it needs to be. I’m really looking forward to seeing this one finished properly. I will update if I can fix it and hopefully that may help someone else who uses a different yarn as well 🙂
The recommended yarn is a very soft yarn, so it grows a lot when it’s blocked. If you use a different yarn, you really need to make the part before the increases longer.
Would it be alright if I made enough of these to sell on Etsy? I really enjoyed making this, and it came out looking awesome, but I can’t find any notices of whether or not I’d be allowed to sell it, so I thought I’d ask.
Thank you so much for asking! I have no problem with you selling finished items on Etsy, I just ask that you give me pattern design credit and include a link to the pattern in the description. Good luck!! 🙂
Hi, As I’ve chosen a different yarn to yours, I had to buy three balls of my yarn to meet the length required. So my issues is, I’ve just used up the first ball and need to add a new one…now later on at the end when we drop our stitches all the way down to the beginning, I’m worried that where I join my new ball may affect the overall looked of the reunited dropped stitches. Is there a safe place to make a join? Sorry if this sounds confusing.
When in doubt, always join at the start/end of a row. With this stitch, I find that’s always the safest measure.
Thanks Jessie, my intention was to join at the start of the row. I’m on row 94. As the first stitch is the slip purl wise, yarn forward..it’s not technically a knitted stitch, so I was going to add it from the second stitch. Going by the photo, the cowl has the reknitted stitch feature up both outer sides, which would include the knitted stitch were I’m going to join my yarn…will it still unravel correctly if I do this join here. Sorry to ask further.
I would join with a loose knot at the end of a row and leave long tails. Then after you have dropped and looped the stitches you can untie the knots and weave in the ends before blocking.
Thank you for your time. I love the look of this cowl and my daughter is dragon crazy.
Hi! I’m currently working on the first 116 rows, and right not that section is measuring about 8.5 inches wide, and also matches the gauge you have for a pre-blocked piece. After I rework the dropped stitches and block the cowl, will the width decrease sufficiently to match your final product?
Yes, the finishing does make it thinner. The length will stay the same, but the width will decrease.
how many balls of wool will i need?
I of the recommended yarn.
Hello! First of all thanks for this wonderful pattern – I haven’t knitted in a while and this has been a lot of fun! I have successfully dropped all my stitches, but when chaining them up in sets of four I am left with only 2 strands at the top – since the pattern calls for 178 rows I think this is correct (178/4 is 44.5) but do I absorb those 2 extras into the last loop of 4 to make a final loop of 6 strands or keep the 4 strand loop and have a final loop of 2 strands?
Thanks, and sorry for the confusing description of my dilemma!
It should have worked to 4 because the cast on has 2. If you end with 2 left, then make your last 2 loops with 5.
Love the pattern! It turned out great!
I posted a picture on Instagram if anyone is interested… https://www.instagram.com/p/BNnpfdRDaYN/
I looks great!!
I would like to make it with more defined, pointy points, but I’m directionally chanllenged!
When do I start incorporating the “Optional Short Rows”? Are they part of the Finishing stage? Say, at Row 1 of the Finish? I’m really not sure.
Also, when it says “Rest row knit” does that mean the rest of the 109 sts?
And does the “So forth” mean the next repeat will be 5 sts beyond, then 3 sts beyond and then what?
If you would please clarify, I’d so appreciate it. Thank you.
I did not write the optional short rows, it was just something a nice Ravelry member did. I would say you start them just before the dropped stitches row. Rest row knit, means to knit to end of the row. so forth means to do the same thing to each section between the drops. That is my best guess.
Thank you Jessie.
I would love to hear from anyone else that can shed some light?
I will give it a try, and post a comment afterward, if what I try actually works.
@Nancv: I’m a fairly new knitter, love a challenge and usually my biggest challenge is reading a pattern! Have you figured this out? Could you share your ‘line-by-line’ directions – I can provide my email 🙂 I completed all the way to Row 178 & am stuck on the next steps (I want the pointed ends) THANKS!!
I got the pointy ends with just blocking.
Hi Michele
I’m also a fairly new knitter, but I had a look at knitting the short rows, and what I worked out is that they’re using a ‘Wrap and turn’ stitch. Essentially what they’re describing is adding a few extra rows of knitting around the stitches that you pull to create the ‘bone’ of the wing.
So, that would mean for the first row, you w:
slip 1 purl wise, knit 13, but then you would turn and wrap, and knit back to the edge, slip 1 purl wise and knit 9 stitches past the next ‘3 dropped stitches’, turn and wrap, knit 21 stitches, turn and wrap, ect.
I would suggest looking up how to do a turn and warp if you haven’t done them before- youtube has a few good videos on the topic.
I hope this helps.
Sorry I didn’t get back to you Michele. It did not work for me – I just finished it flat, which still turned out very beautiful – and had nothing further to contribute.
But just this weekend I decided to give it another try. The short-rows are worked before the drop 3-sts portion.
I used stitch-markers to identify the “dedicated” stitches that would be dropped in the Finishing portion of the instructions.
Lauren’s directions helped tremendously (thank you Lauren), but it still did not give me the pointy ends. It “flared” out the sections, but did not give the desired look.
Please note that I only did the 9-sts short rows as Lauren explained. Perhaps I needed to continue, but again, I didn’t know how to calculate the number of stitches for the w&t technique in subsequent rows, AND I wouldn’t know when to stop (is it 9-sts short rows, followed by 7-sts short rows? then what?…) plus, I was running out of the yarn.
I do wish someone out there with experience would provide line-by-line instructions on getting that “dragon wing” look (pointy ends) — it would be so fabulous! (and much appreciated, thank you)
The one in the photos does not have the short rows (I have never tried that version, it is just something a reader wrote for those who want it). All I did was heavily block it to give it the points.
Hi there.
I was wondering if this was able to be knitted in the stockinette stitch, instead of the garter stitch? I was thinking about adding a bit of colour alongside the ‘ridges’, and to do that, I would be using a duplicate stitch, which doesn’t seem to work very well with a garter stitch.
You could, I think you may have to chain less stitches at a time to get it to work because stockinette stitches are taller.
Any thoughts on a way to use another yarn weight with this? Is there a part of the pattern that could be repeated to add more segments maybe? I have a skein of hand dyed that I think would look amazing, but it’s fingering weight.
If you look at the chart you could add stitches between the repeats
Hi, Jessie. I have a similar problem as Jess. I am not able to order yarn from abroad and it seems that there is no multicolour yarn of same weight that would make the dragon cowl look as good as it deserves. So I was wondering.. Is it possible to knit it with a double strand since the yarn I found has same material composition, same weight (120 g) and double length (480)? I am a beginner but from this I assume it’s half lighter as your recommended yarn. Would the pattern work the same? Especially with the dropped stitches.
Thank you so much!
You would need to knit a swatch to see if the gauge is close. If it is, you should be good. 🙂
Hey! I looked at the pattern graph and I don’t understand what Green marker and orange marker are? Can you explain that to me or is there something I have missed in your post about it?
THe graph was made by a fan, I haven’t used it, I made mine as the pattern is written.
Hi Nikki,
The graph is a brilliant piece of work! The green and orange markers are just that. Place them as you go, starting with green markers as indicated on Row 117 and orange markers as indicated on Row 120. What you will find is that you will straight knit all the rows not highlighted until you find the row number highlighted in the particular color (say green). That’s the indication that on that row at every green marker you will do the KFB stitch. Then continue straight knitting until you are on the row highlighted in orange. On that row, you will do the KFB stitch at every orange marker. That’s it. Super simple… you don’t need to count x’s or dots. Trust the graph-pattern, it works!
Hi Jesse, love the pattern and was successful in following it. I would like to try to do the ribs in an contrasting colour. I haven’t been able to determine which stitches I would do the contrasting colour in at the beginning. Is it possible for you to tell me how to cast on the stitches with the contrasting stitches in the correct place? Thanks for your help in this.
If you look at the chart that was made by another reader, you should be able to determine which stitches should be in a contrasting color.
this is a great idea! please let us know which colour you choose, thanks Marianne
Gauge is fine but it is way too short so I’m just going to keep adding rows following the increase pattern until it’s the length I want (hopefully it won’t be too wide by the end). Fingers crossed I don’t run out of the fabulous yarn I’m using (Stylecraft Cabaret – Storm).
I’ll post a picture when it’s done…
It is a cowl, so it’s rather short.
I’m probably really over thinking this but, where do I drop stitches? I made it to row 125 before this question popped up….
at the end
How many stitches do you need to knit before you drop the first three and how many stitches need to be knit between the drops?
It’s all in the pattern, the drops are in the finishing section.
Thanks, I got to the video after the optional short rows and thought that was the end. I just need to learn to read the full page. Thanks again
For the optional rows, is that done after the finishing rows where stitches are dropped or before?
before
Hello! Thank you so much for the Pattern!! I LOVE it. The tutorials are GREAT!! I just have one question. I am big breasted . LOL . How many more stitches do you think I should add so It would hang nice. Thanks Again
So am I and it looks good on me as is.
Is it possible to make this longer? Could I knit more rows. If I kept increasing. I am much bigger than the dummy in your photo.
I am a size 22 and I wear it as is. However, you could make more of the repeat rows that happen before the increase rows to make it longer.
Thank you. It is so striking and beautiful. I’ll knit it as is.
Dear Miss Jessie, My husband & I are archers.. he found a pattern about 15 years ago… I just checked the link & it is still viable…. Ren Fair & Rendezvous lovers as we are, we thought to share it with you… https://www.google.com/search?q=sisainen+villapaita+sagittaria+shawl&client=firefox-b-1-ab&tbm=isch&tbo=u&source=univ&sa=X&ved=0ahUKEwipzcionOPbAhXGmVkKHcRgC1gQsAQIKA&biw=1366&bih=603 … also called The Archers Shawl… you can see why.. gun metal gray ?? Love Marianne (i feel like i won the Lottery by finding your wonderful site, ty, ty , ty!!!)
Okay to sell the knitted product?
Sure is, thank you for asking. I wish you lots of success. 🙂
To everyone wanting the pattern for pointing ends:
I have found it, given above, in the pattern chart (see https://jessieathome.com/wp-content/uploads/2015/10/dragon-wing-w-legend.pdf)
I am so excited to be giving this a 3rd try, this time following the chart. See my response to Nikki’s question about the green/orange markers if you are confused (as I was).
I will write an update if I have helpful hints when I get to the “short rows” part.
As a fan of House Targaryen, I approve
I am really enjoying this pattern! I also was working on this before you updated the pattern and I may have messed up.
In this new pattern you kfb right after the marker. In the old one I have the marker, 1 knit stitch, and then the kfb.
Did I mess up my counting or did the pattern change?
Will this affect how the points/short rows turn out?
As long as the 3 sts in the middle of each set of markers is always knit and never increased or decreased, you should be fine with the increase just after those 3 or one st past.
The short rows finally clicked with me! It was the chart that helped the most. I recommend adding stitch markers to mark either side of where the 3 dropped stitch sections are going to be. If you add them before you start the KFB increases it helps avoid as much counting, and for sure add them before starting the short rows.
Add a “lifeline” to Row 174 to help in case you need to rip back.
In case anyone else is looking for this:
The instructions for the short rows can be found under the link below. (including video links)
It replaces the finishing line of the original pattern.
https://www.ravelry.com/projects/grenacia/dragon-wing-cowl
I’ve successfully completed this Dragon and it’s great! Thanks so much! I chose black which limited the hours that my eyeballs could decipher anything in the garter st at so I will try the next one in st.st. Just one question, why the long 2more tail? It’s never used.
In case you want to use it to make a crochet edge or to tack anything down.
I’m confused by the {bracketed instructions}in the pattern.
{stitch count for row here} -> not row instructions, just the stitch count so you can check your work if you would like.
Hi Jessie,
Having reached Row 115, I have realised that I have stupidly cast on with 36 stitches instead of 35!
Is there way to rectify this with the rest of the pattern, or will I need to begin again (whilst wearing me glasses!).
Many Thanks,
Jo.
P.S This is such a lovely pattern!
Easy fix! Just add it on to one side of the piece, so instead of having 2 sts on one of the sides, you’ll have 3. The edges get folded under when you block, so no one will know.
If you can wait until the end of the week, I’m in the process of updating this pattern to make it even more clear and to add in short row shaping at the end. There will also be a video. Just make sure the straight section you just did is 15″ long. 🙂
That’s great, thanks so much!
Hi Jessie,
I was on row 125 when you updated the pattern, so now I’m a little lost. Do you still have the original pattern somewhere?
I’m really enjoying knitting this BTW, the chain edges make my knitting look so much neater
Thanks
Sam
Row 126: Slip 1 purl wise with yarn in front, k1, pm, k3, pm, k5, pm, k3, pm, kfb, k3, pm, k3, pm, kfb, k5, pm, k3, pm, k5, pm, k3, pm, k2. {43 sts}
Row 127: Slip 1 purl wise with yarn in front, k past 4 markers, kfb, k past 2 more markers, kfb, k to end. {45 sts}
Rows 128-129: Slip 1 purl wise with yarn in front, k to end.
Continue with Row 17 of new pattern.
If you’re having problems, watch the linked video. You’re picking up during the first part of the increase section.
Cheers Jessie,
The videos really helped and I’ve just bound off! Looking forward to starting the blocking next which is a new technique for me so really glad it’s in your video.
I suspect my niece will be asking for several in multiple colours when she sees this 🙂
Woo Hoo!! I have plans for a 2 color version, but I’m not sure how long it will take to get sampled and written. I’m a busy bee lately, 🙂
Approx how long did this take to make?
My mom is thinking about making this for my daughter’s birthday.
It depends on how fast you knit. I’d say maybe 5-10 hours? I need to start timing my sample-making.
Is there any chance there could be a typo in the gauge? I can only find yarn that has 19st and 24 rows, but your notes say 34 rows.
I checked multiple labels at the yarn shop and could not find any yarn with those proportions. If it was 34 rows, the sts were much higher than 19.
Am I misinterpreting something?
Thanks.
The gauge will depend on how YOU knit it, not what the ball band says. Find the right weight yarn and the right size needles and make a gauge swatch. See what you get. Check out my post on gauge if your confused.
https://www.jessieathome.com/all-about-gauge/
Hi! First, thank you so much for this pattern, its so beautiful! I was, however, very stupid. I’ve run into a problem on the short rows. I watched the video for the first w&t, which didn’t include picking up the wrap, and ended up doing this for all the w&ts. I was wondering how much this might affect the look of this cowl? Since I really don’t want to rip out the whole 42 lines I have of it so far. (It doesn’t seem to be too bad right now, but I have no experience with short rows, so I really don’t know.) But I also want it to be pretty. What would you recommend? Thank you so much!
If you’re happy with how it looks, then leave it. I would just do the same thing for the rest of them, as it will look different if you change. The pick ups aren’t as noticeable in garter stitch.
Thank you so much! I’ll finish it with all the w&t wraps not picked up and knit together. Do you think that I can still do the Jacob’s ladder (As my sets of three are all still intact)? Thanks again!!
As long as your sets of 3 have only ever been knit (purl would be fine too), then they should drop just fine so you can do the Jacob’s ladder part. 🙂
Nevermind about my last reply- the Jacob’s ladder worked great! I’m so happy, thank you so much for the pattern!! I’m going to wear this everywhere now!
Woo Hoo!!! If you made a Ravelry project for it, please be sure to link the pattern and drop me a message so I can see it all done. 🙂
Hi Jessie! I was wondering if it would be possible to continue knitting the increase rows sections a few more times, since I’ve made the error of having broader shoulders than the “ideal” wearer of this cowl. I think that I would be able to do it if I just changed some of the numbers in the short rows section, but I’m not sure. If anyone here has done the same, I’d love to know if that was possible. I might also find a way to connect the two parts of the cowl together without requiring them to touch. This has been such a fun pattern to knit!
You could totally do that and not even have to adjust the short row numbers as they are based off the stitch markers, so they will still work. 🙂 Did you see the free printable project page link I added to the bottom of the post? That would be a great place to keep track of all your adjustments. You can get it here: https://mailchi.mp/jessieathome/dwcpp
I love this pattern!! I’m nearly done (working through the jacob’s ladder) and I want to offer a little advice so no one else makes my mistake: DON’T USE A HIGH-FUZZ ANIMAL FIBER YARN. This cowl is gorgeous, and I think it’s absolutely going to be worth it, but I’ve spent SO MUCH TIME prying the fibers apart while dropping stitches. Use acrylic or low-fuzz fibers!!!!!
You know, I could have sworn I made that note – but it’s not there. It’s probably something I MEANT to say and forgot. Thank you for the reminder!!!
Newbie knitter here, I’m absolutely smitten with this project!
But, and I feel SO foolish writing this… I… Can’t find the pattern? As a student I can’t afford the paid version and wanted to support you through the ads,,, I believe it should appear after the stitch list but. It’s not there.
I’m not good with videos, so I was looking forward to the written pattern! Am I missing something?
Thanks and sorry,
Chocolate
This is one of my patterns that is only for sale. There are quite a few that are free with ads, this is one that is not.
I can’t see the pattern can U only see it on video?icant knit while at watching video
You can buy the pattern, the video is meant as an aid for those who purchase the pattern