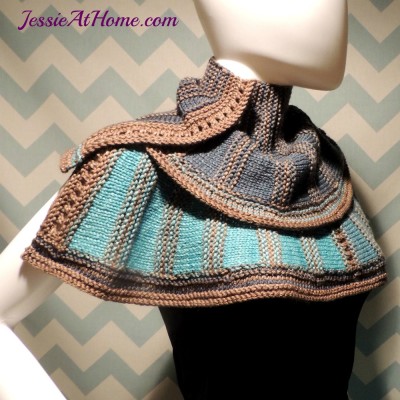
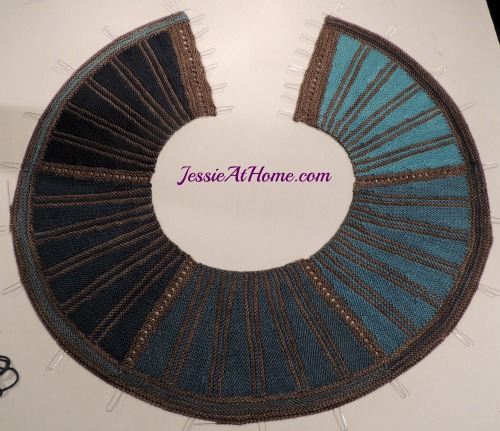
Today I have a fun knit pattern for you using a gradient pack from Frabjous Fibers along with an accent color. This long skinny wrap features alternating sections of garter stitch with sections of stockinette stitch and utilizes short rows to create it’s round shape. This fun piece can be worn as a short wrap, a scarf, wrapped around your neck as a cowl, draped like a shawl, or any number of fun ways! I hope you enjoy wearing it as much as I enjoyed designing it.
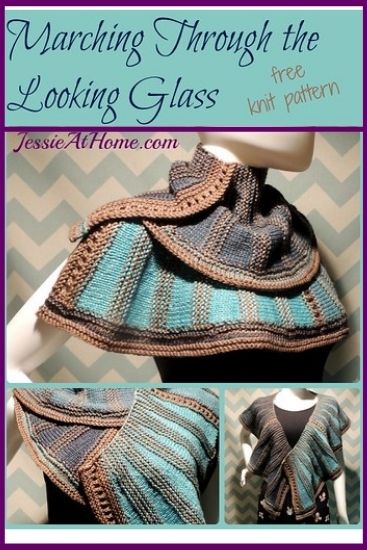

Marching Through the Looking Glass
Knit Pattern
Intermediate Skill Level
Designed by Jessie Rayot
Size:
44″ inside circumference
88″ outside circumference
9″ tall
Yarn:
Frabjous Fibers, Wonderland Yarns: March Hare ~ Dormouse #34: 4 oz skein, Color A; “Down the Rabbit Hole” Mome Rath #24: mini skein pack, Colors B, C, D, E, & F
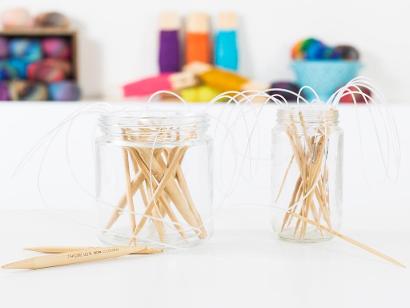
Needles:
US 8/5.00 mm
Gauge:
18 sts x 29 rows = 4″ in garter st
Stitches and Skills used:
k ~ knit
p ~ purl
m1 ~ make one
co ~ cast on
st(s) ~ stitch(es)
Getting Started:
Use any method of a make one increase that you prefer for the m1 stitches.
Make sure your gauge is correct. If your tension is too much looser than mine, you may find you do not have enough yarn to finish the border. If this is the case, omit rows 5 & 6 from the border.
This pattern uses short rows for shaping the wedges. In the pattern you will see “wrap and turn” listed when you turn a short row. It is important that when you come back the other direction and work into the wrapped st, you pick up the wrap; otherwise you will have a little hole in your work. This is done b slipping the wrap off the st, and then knitting through both loops (the st and the wrap). If you want to learn more about short rows, there is a wonderful free class on Craftsy that explains it very well.
Pattern:
With color A, CO 36
Rows 1~4: K to to end. ~ 36 sts
Row 5: P to end. ~ 36 sts
Row 6: K1, (k2tog, yo) until 1 st remains, k last st. ~ 36 sts
Row 7: P to end. ~ 36 sts
Rows 8~12: K to to end. ~ 36 sts
Switch to color B
Row 13: K to to end. ~ 36 sts
Row 14: K6, wrap and turn, leave remaining sts unworked. ~ 6 sts worked
Row 15: P to end.
Row 16: K12, wrap and turn, leave remaining sts unworked. ~ 12 sts worked
Row 17: P to end.
Row 18: K18, wrap and turn, leave remaining sts unworked. ~ 18 sts worked
Row 19: P to end.
Row 20: K24, wrap and turn, leave remaining sts unworked. ~ 24 sts worked
Row 21: P to end.
Row 22: K30, wrap and turn, leave remaining sts unworked. ~ 30 sts worked
Row 23: P to end.
Row 24: K to end. ~ 36 sts
Switch to color A.
Rows 25~26: K to end. ~ 36 sts
Switch to color B.
Rows 27~28: K to end. ~ 36 sts
Switch to color A.
Rows 29~30: K to end. ~ 36 sts
Switch to color B.
Rows 31: K to end. ~ 36 sts
Row 32: K30, wrap and turn, leave remaining sts unworked. ~ 30 sts worked
Row 33: P to end.
Row 34: K24, wrap and turn, leave remaining sts unworked. ~ 24 sts worked
Row 35: P to end.
Row 36: K18, wrap and turn, leave remaining sts unworked. ~ 18 sts worked
Row 37: P to end.
Row 38: K12, wrap and turn, leave remaining sts unworked. ~ 12 sts worked
Row 39: P to end.
Row 40: K6, wrap and turn, leave remaining sts unworked. ~ 6 sts worked
Row 41: P to end.
Row 42: K to end.
Switch to color A.
Rows 43~44: K to end. ~ 36 sts
Switch to color B.
Rows 45~46: K to end. ~ 36 sts
Switch to color A.
Rows 47~48: K to end. ~ 36 sts
Switch to color B.
Repeat Rows 13~48: 1 more time. ~ 84 rows total at this point
Repeat Rows 13~42: 1 more time. ~ 114 rows total at this point
Switch to color A.
Rows 115~116: K to to end. ~ 36 sts
Row 117: P to end. ~ 36 sts
Row 118: K1, (k2tog, yo) until 1 st remains, k last st. ~ 36 sts
Row 119: P to end. ~ 36 sts
Row 120: K to to end. ~ 36 sts
Repeat Rows 13~120: Replacing color B with color C. ~ 228 rows total at this point
Repeat Rows 13~120: Replacing color B with color D. ~ 336 rows total at this point
Repeat Rows 13~120: Replacing color B with color E. ~ 444 rows total at this point
Repeat Rows 13~114: Replacing color B with color F. ~ 546 rows total at this point
Rows 547~552: K to to end. ~ 36 sts
Row 553: P to end. ~ 36 sts
Row 554: K1, (k2tog, yo) until 1 st remains, k last st. ~ 36 sts
Row 555: P to end. ~ 36 sts
Rows 556~558: K to to end. ~ 36 sts
Bind off knit wise, leaving last loop on right hand needle.
BOTTOM BORDER:
Row 1: Pick up and knit into 371 sts along the bottom of piece in the following manner: 7 sts from first color A section * [8 sts from next stockinette st section, 4 sts from next garter st section] 5 times, 8 sts from next stockinette st section, ** 4 sts from the next color A section, repeat from * 3 more times, then from * to ** once more, then pick up and knit into 8 sts from last color A section. ~372 sts on needles (1 from bind off and 371 picked up sts)
Row 2: RIGHT SIDE: K to end. ~ 372 sts
Row 3: WRONG SIDES: Switch to color B (do not cut color A), k78, switch to color C (do not cut color B), k72, switch to color D (do not cut color C), k72, switch to color E (do not cut color D), k72, switch to color F (do not cut color E) k78. ~ 372 sts
Row 4: DO NOT TURN, work this row from the WRONG SIDE: With color A, p6, m1, [p20, m1] 18 times, p6. ~ 391 sts
Row 5: RIGHT SIDE: Switch to color F (do not cut color A), k82, switch to color E (cut color F), k76, switch to color D (cut color E), k75, switch to color C (cut color D) k76, switch to color B (cut color C) k82. ~ 391 sts
Row 6: DO NOT TURN, work this row from the RIGHT SIDE: K to end. ~ 391 sts
Rows 7&8: K to end. ~ 391 sts
Bind off knit wise. Weave in all the ends. Block piece.
Wear or give and enjoy!
If you enjoy this free knit pattern, please consider buying some of your supplies from one of these affiliate links. Thank you.
Did you enjoy what you found here at Jessie At Home? Then sign up for my newsletter and like my Facebook page, so you’ll get all the updates on new tutorials, other posts, sales, and coming events.
If you have any questions, want to share pictures of your work, or just want to chat with Jessie and other crafty individuals, than join my Facebook group.

© Copyright 2015 Jessie Rayot / Jessie At Home LLC All my videos, patterns, charts, photos and posts are my own work, so you may not copy them in any way. If you want to share this information with someone, then share the link to this post. If you want to share on your own blog / website, then you may use the first photo in this post and link back to this post. Also, you may not give away printed copies of this post.


This is a gorgeous pattern and so unique. Definitely worth the wait. Thanks for your hard work. ?
Thank you so much!!
I really love it. Will try to do it, but have a queue now.
Very very nice, a great work, colorfull
A lot of thanks for the explanations!
Thank you so much for sharing this lovely pattern! As soon as I saw it, I knew I had to make one. It’s just too pretty to pass up.
Oh, this is gorgeous! Is there any way you would consider writing something similar for crochet, for us non-knitters?
It wasn’t on my list, but I can think about it.
Thank you…appreciate your thinking about it; I have no idea, of course, what is involved in creating patterns..lots of time, trials, counting, etc. I just had to ask, because it is so totally cool & unique! (oops, just gave away my age group, hehe)
I too would love to crochet this pattern as my knitting skills are so bad that they would make the Jabberwocky cry.
I love the steampunk look and my daughter wants one. So please consider making it into a crochet pattern.
I just added that to my request list. It is something I wanted to do, I just haven’t gotten to it yet.
Me, too, please, please, please!!! It’s so pretty and unique. I actually pouted when I realized it was knit. Not pretty on a 60 year old. ?
It’s so pretty- not really my colors but lovely. With the last picture it struck me it could be a full circle skirt. It’s stunningly hard to find skirt patterns, harder to find what I like with what I can manage so I tend to notice.
Not that I could manage this either but it’s delightful.
really love the colors in this piece!!!
Thank you!
I just signed up for your newsletter and am looking through your beautiful patterns. This one just blows me away! The design is so unusual – one more item to add to my “stuff to make” list!
Thank you!!
question: in picture it shows wrap “resting” on sholder, what keeps wrap from sliding off? Are there any snaps, buttons, closers of any kind used? I don’t get it on how the wrap will stay put on body. I would like to make this if there are ways that it will stay put. Thanks Arlene
I would suggest using a shawl pin.
This comment is not just about this beautiful wrap…it is about you. You are one of the most incredible, talented, imaginative, innovative designers I have run across. I love your designs. This is a wondrous blessing you have been given. Thank you for your generous sharing.
Thank you so much. You made my day! <3
Beautiful design and work. FYI: the “Craftsy” link doesn’t work anymore.
Thank you.
I tried to find all of those old links, they still pop up now and then. Thanks for the heads up!