Got Cricut? Need flowers? Here’s how and it’s easy..well mostly easy, and lots of fun. The products used in this review were provided by Cricut.
I’ve been wanting to compare all the Cricut flowers for a while now, so I thought I would take advantage of the many flower parts and make a little tutorial for you. But first, a little detour to tell you about a fun Cricut Crafternoon event I went to earlier this month.
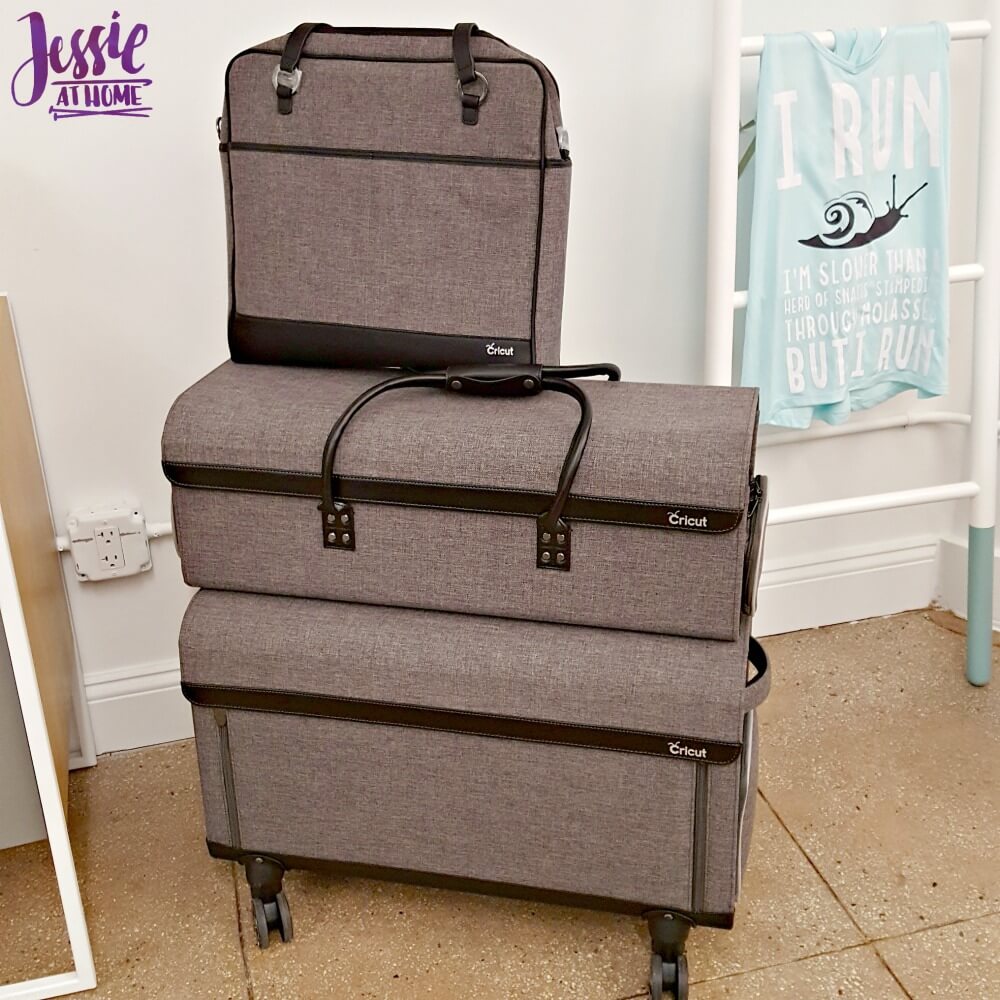
My awesome friend Marie and I met up in NYC to go to a Cricut Crafternoon event. There were some really cool announcements about some secret products coming soon, and some super secret hints of things they couldn’t even share with us. It was pretty nifty. One not so secret new product that is already out is this set of carrying cases, aren’t they just awesome!? You can find them HERE.
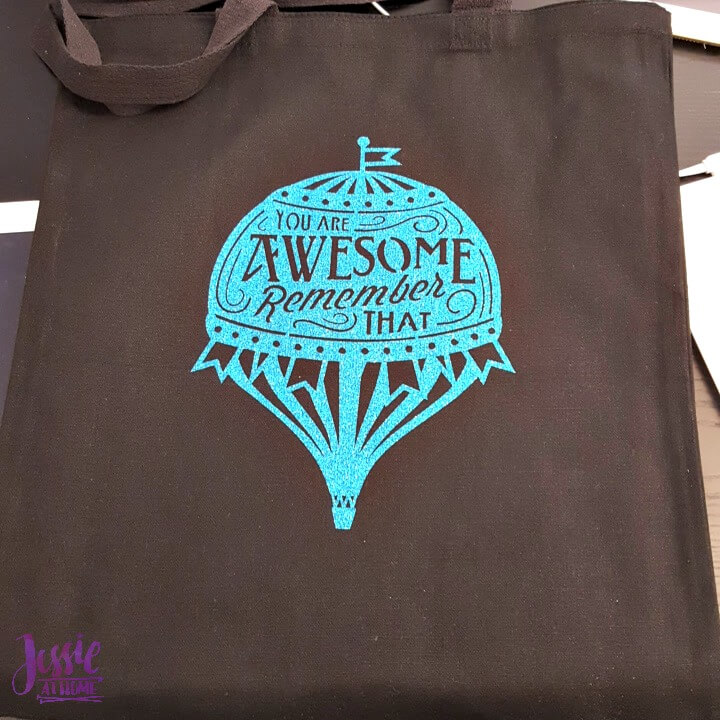
So this is the fun bag that I made, I really love it!
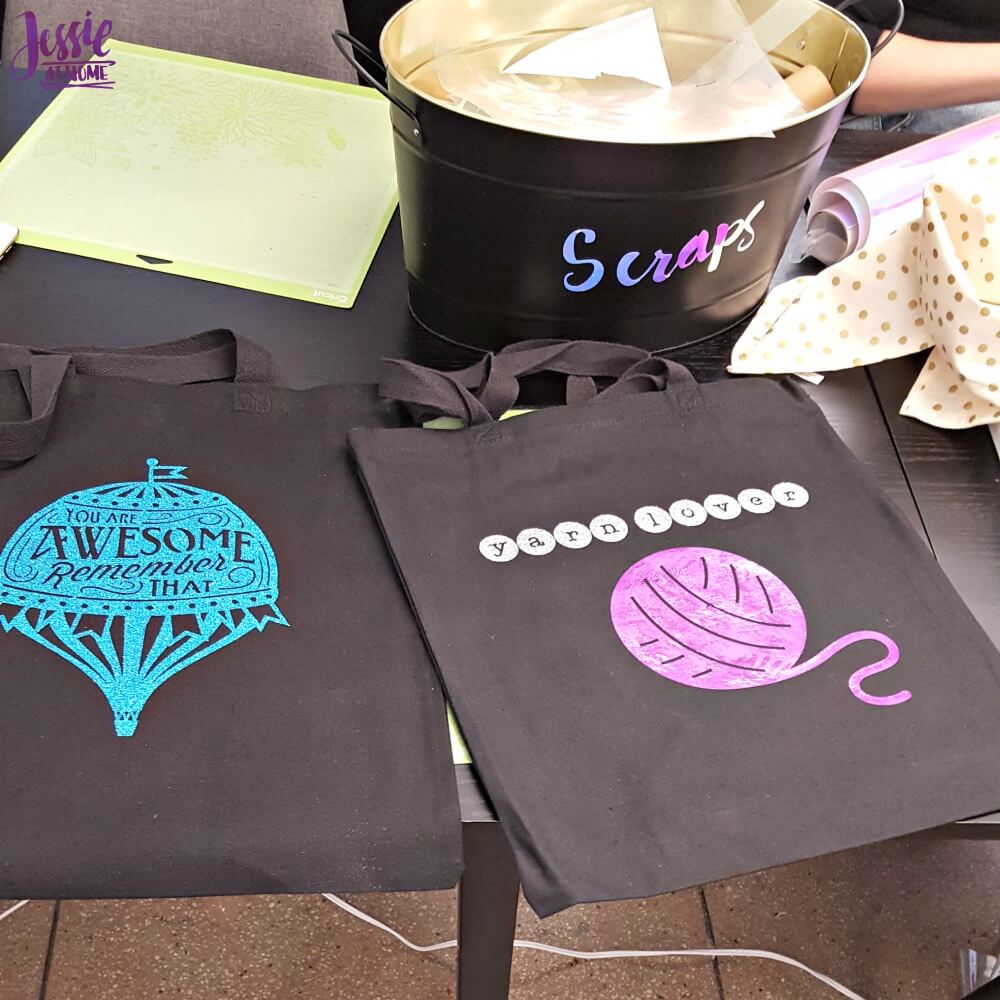
And here are Marie and my bags together. Marie’s Yarn Lover bag is really nifty. I can’t believe I never noticed the yarn image in the Cricut image library before!
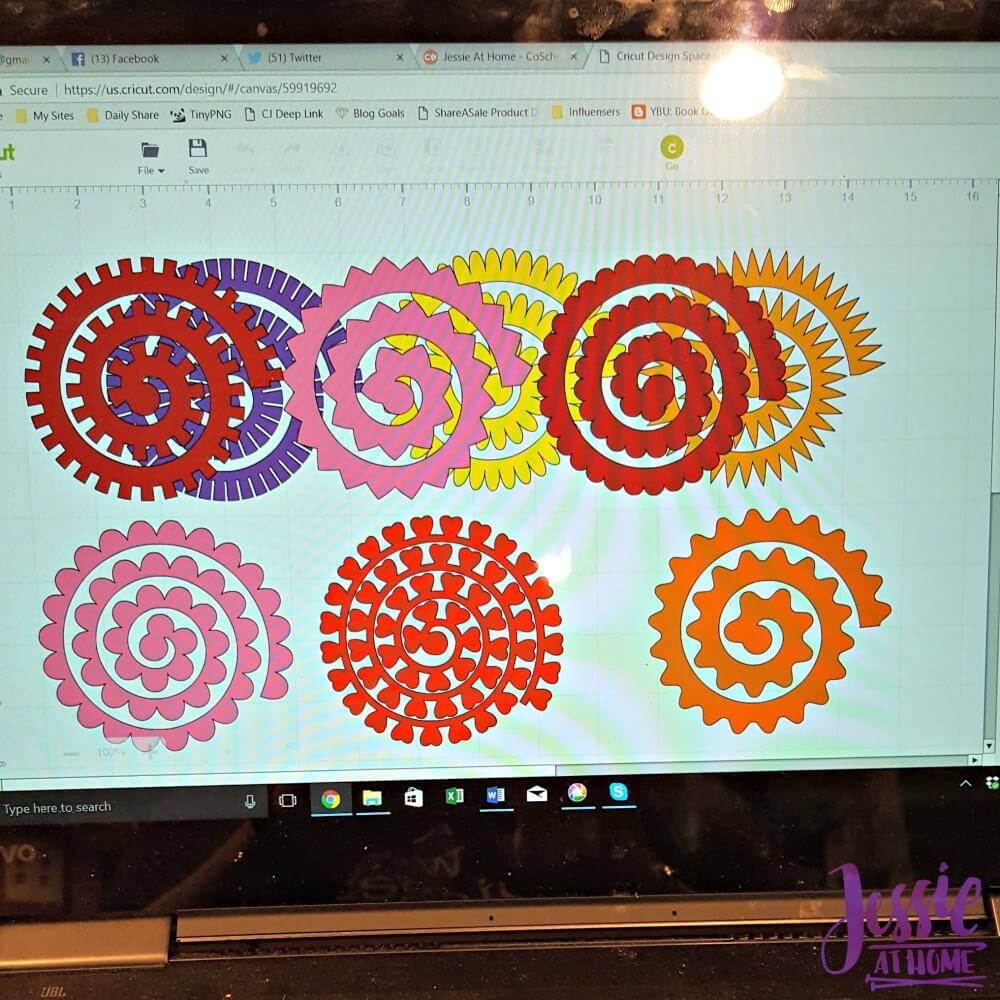
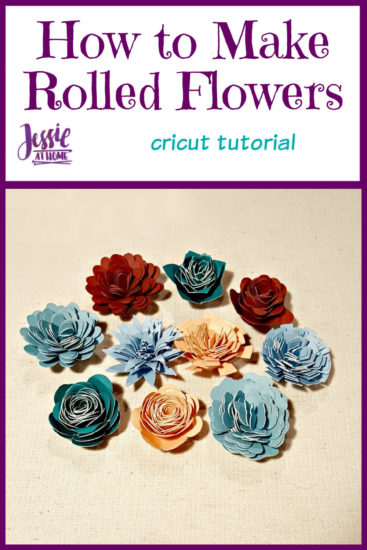
OK, Rolled Flowers. I found 10 of them in the image library, and they are all included in Cricut access, which really, every Cricut owner should be taking advantage of! I added all 10 of them to my canvas, and blew them each up to 4 inches wide (the flowers will be much smaller). You can see that it doesn’t matter where you place the flowers, Design Space will lay them out for cutting for you. I didn’t change any colors as I was using scrap card stock pieces to make the flowers, so I just chose the colors as it was time to cut.
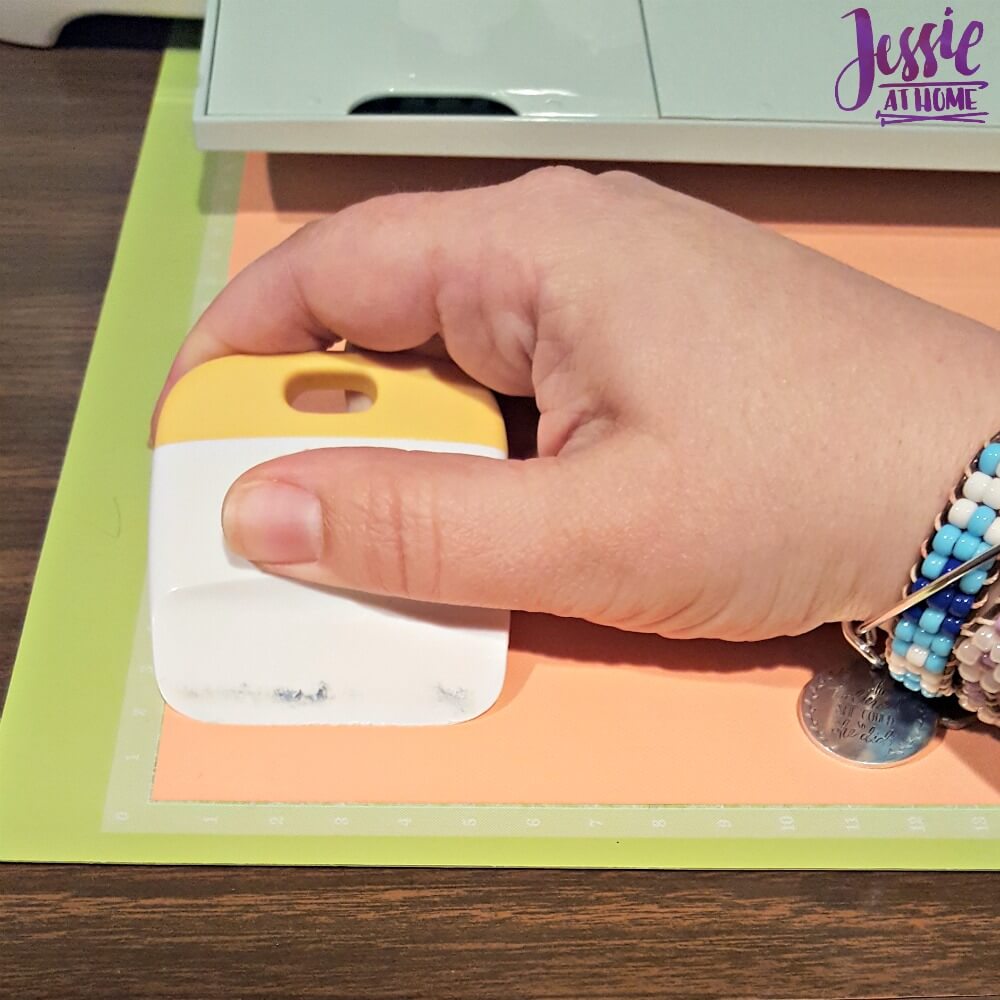
It is SUPER important that the cardstock is FIRMLY adhered to your mat. If your mat is not too sticky anymore, you may need to use a new mat. Some images are fine on a less sticky mat, but these flowers are not. I used my scraper tool (find it HERE) to really stick the cardstock down.
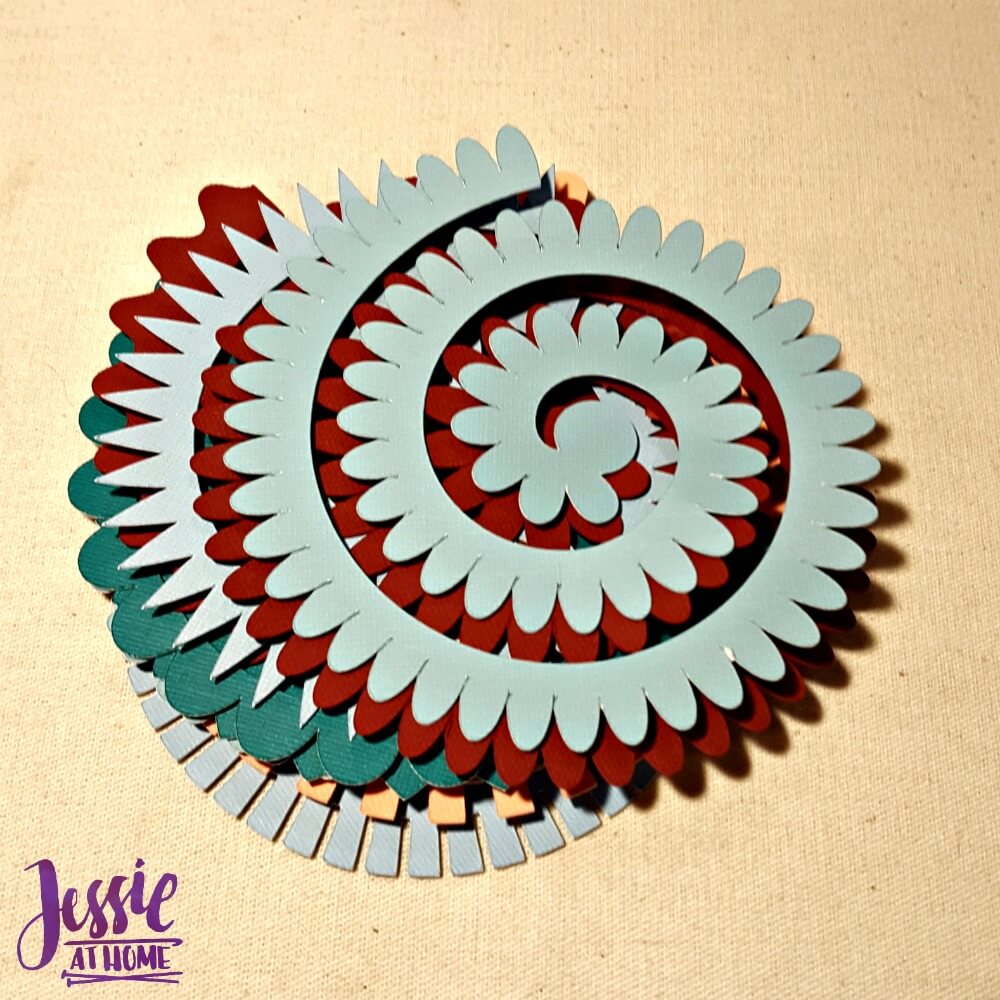
Now cut away and soon you will have a pile of flat flowers! No, really, those are flowers.
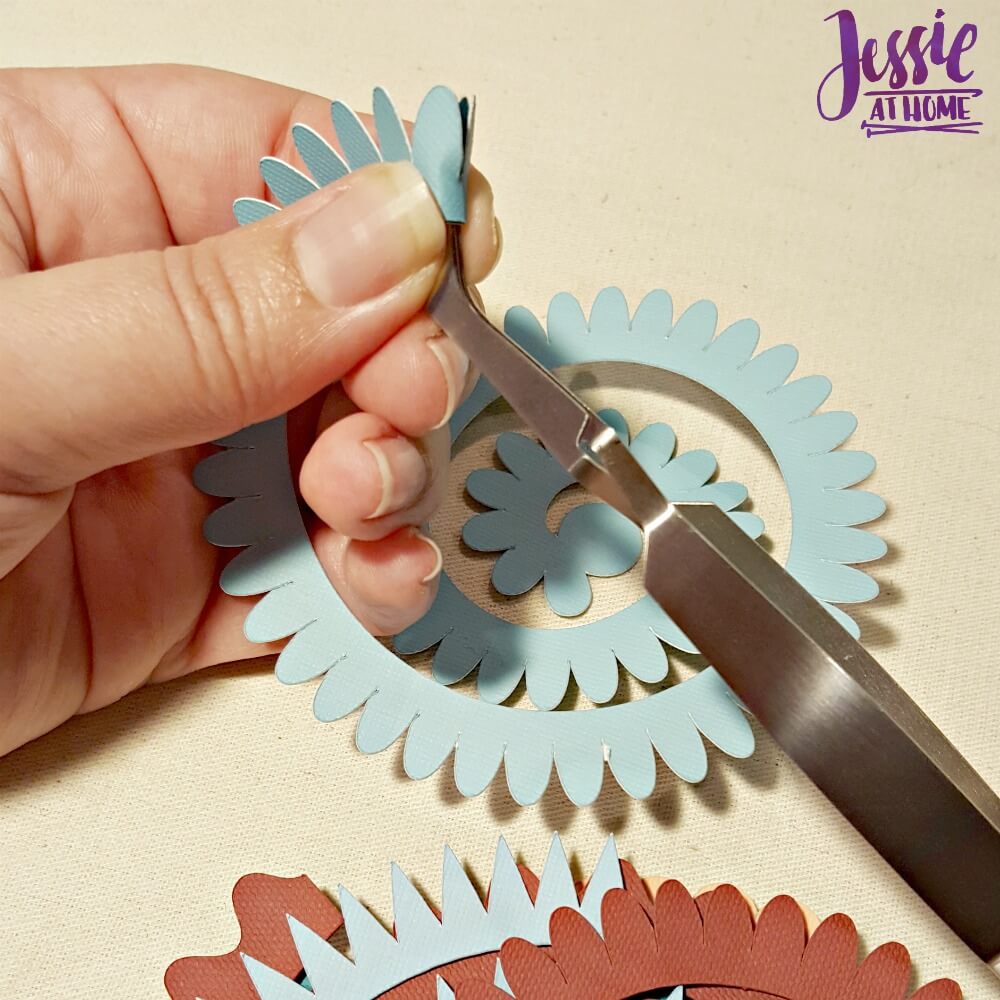
OK, for this step you really need a set of tweezers that are tightly closed in there resting position. It’s just going drive you crazy any other way. You can find the awesome Cricut tweezers HERE – really, I recommend getting one of the accessory kits anyway! Now, grab the end of the spiral, flat side towards you, and start twirling. Try to keep the bottom as flat as possible.
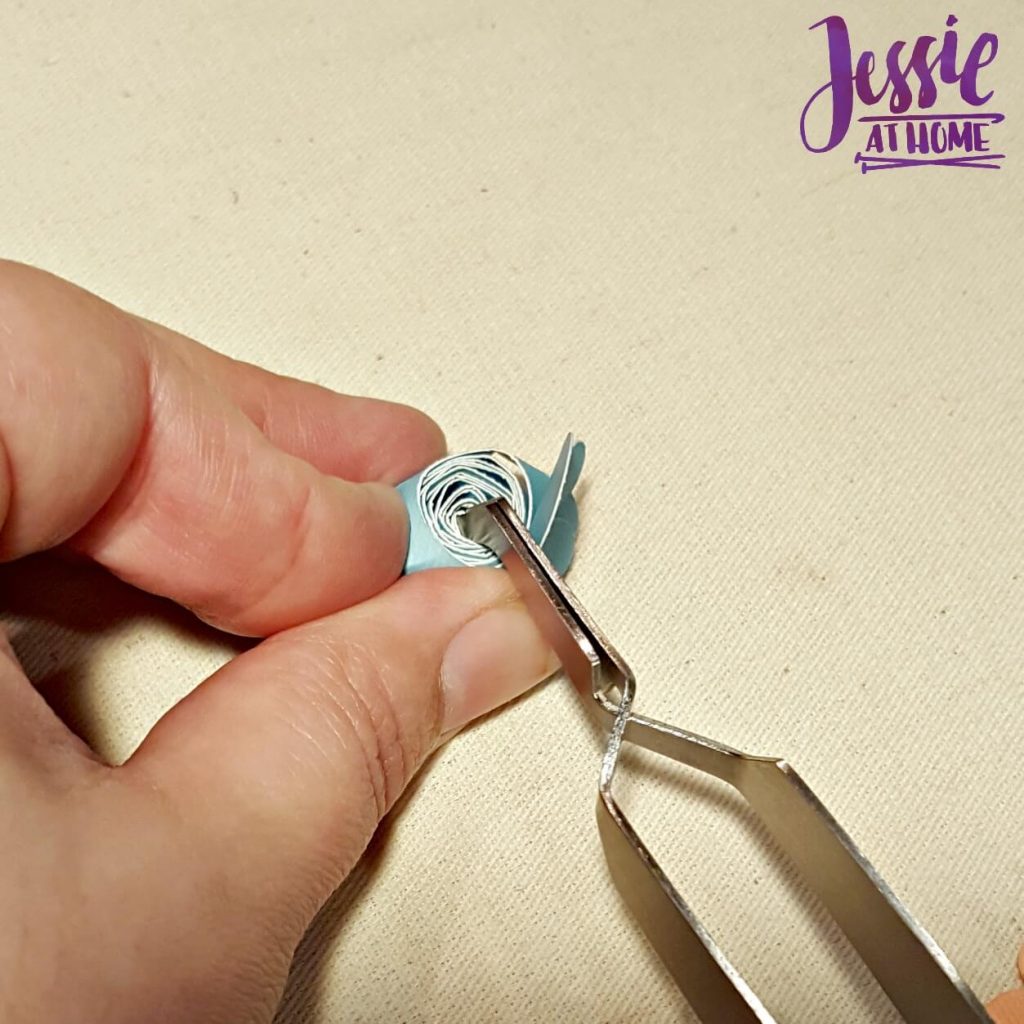
Once your flower is totally twirled, with just the circle bottom sticking up, place it upside down on your table (don’t let go, you don’t want it to unwind!) and carefully remove the tweezers. place a good sized dot of hot glue on the spiral and fold down the circle to seal it all together.
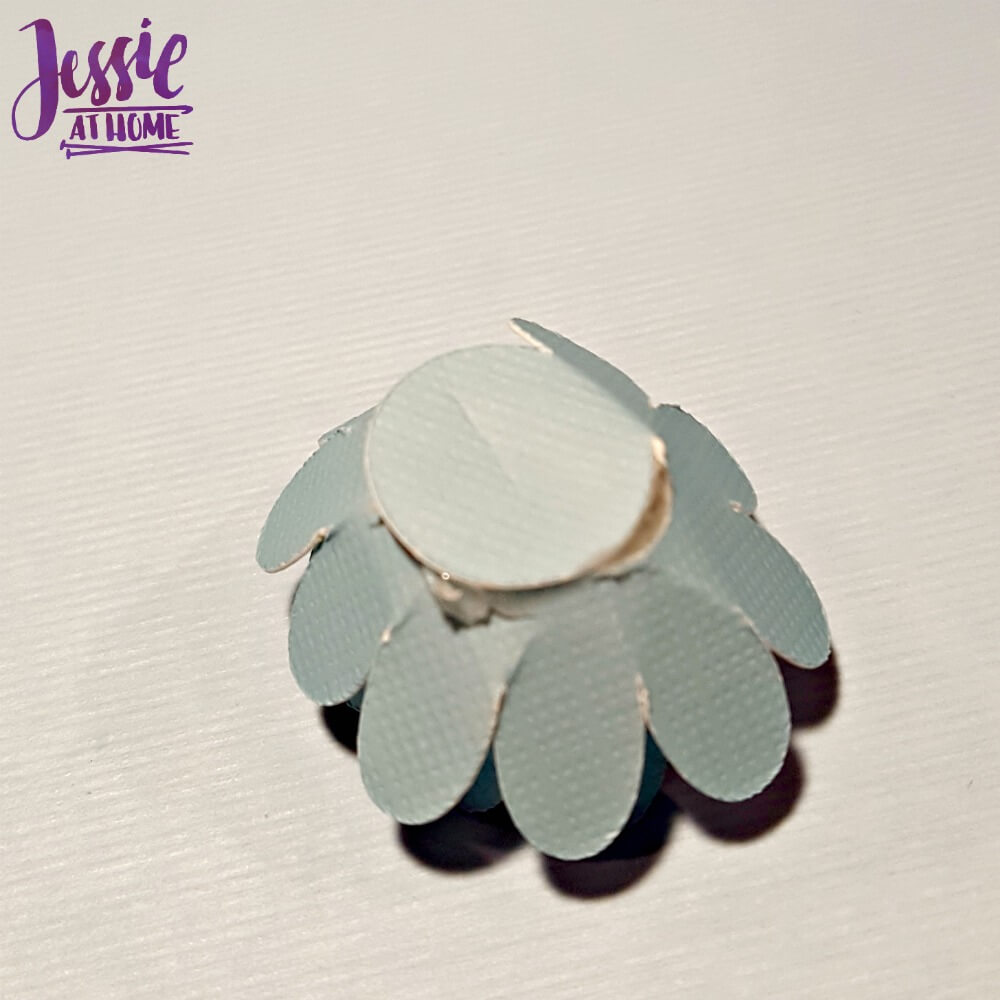
See, all sealed up!

Now flip it over and carefully spread out the petals. This is easier with some flowers then others. I found the flowers with the oval shaped petals, the heart shaped petals, the spiky petals, and the rectangular petals to be the easiest to open (though the heart shaped petals are the hardest to twirl). The others were very difficult to spread apart at such a small size. The finished flowers are only about an inch across after they have been opened.
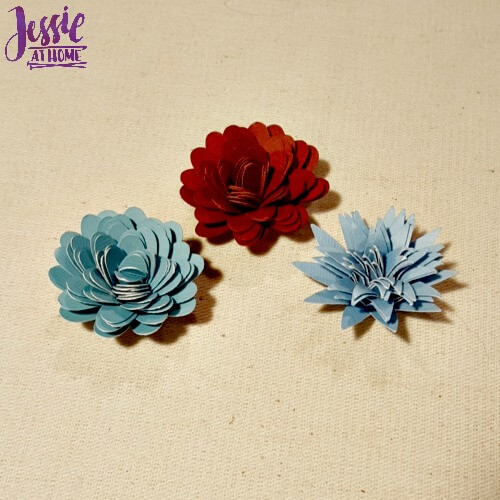
Now keep going and soon you will have 3 flowers.
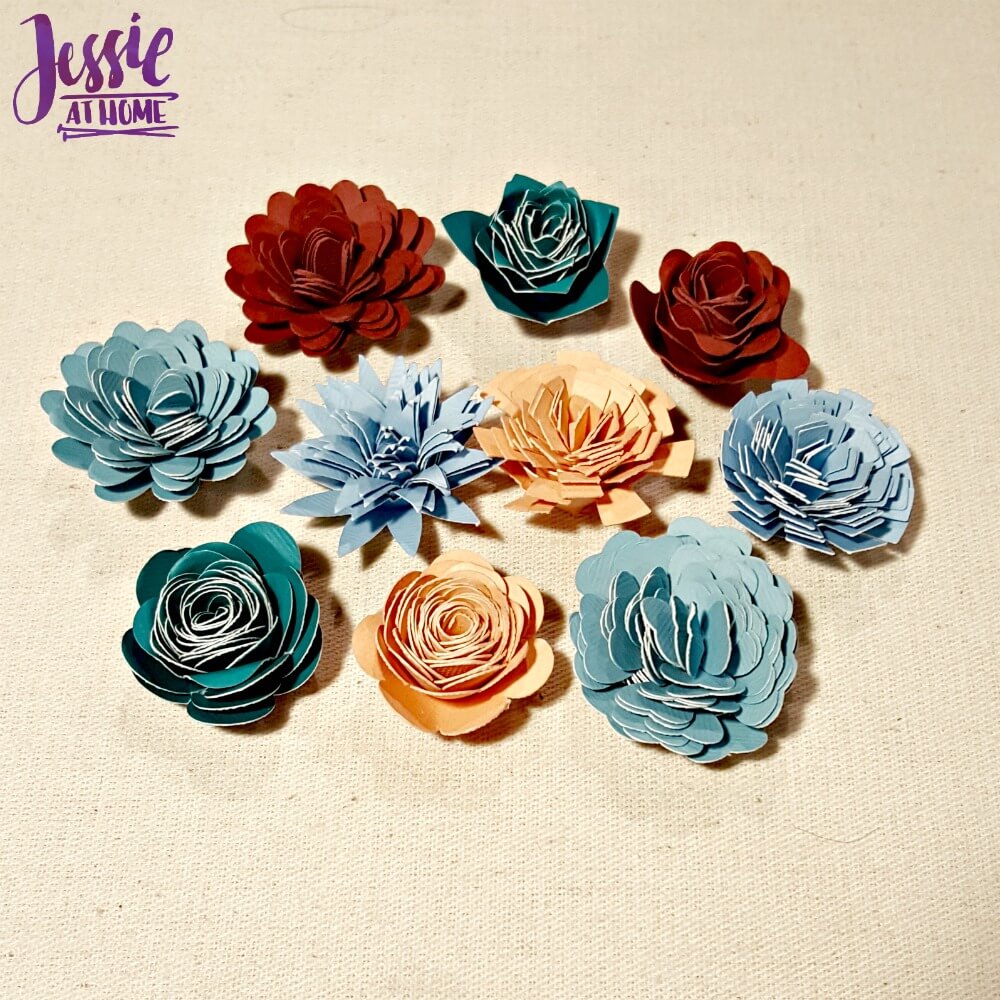
Pretty soon all 10 will be done and you will be able to determine what flowers you like the best. I think I may try this whole experiment again later with much larger flowers. I’d love to see how they look.
Happy Crafting!
[signature]


Beautiful. Thank You.
Thank goodness this popped up on my screen! I was using not so nice words while trying to make these!! the tweezers is the trick! TY TY TY
The tweezers really do make it easier. Glad I could help!
Hi, I can’t seem to find where you have your file. When searching cricut all access I’m not seeing anything under rolled or wrap flowers. Please help!!! Thank you so much.
I just searched “flowers” and scrolled until I found some of the wrapped ones. They look like spirals when they are flat. I don’t know that there is a specific file for them.
what pressure or card stock setting do you use? I have a new blade and new mat and it still tears or sticks too much trying to get it off the mat 🙁
I was using regular card stock, so I had it on the card stock setting. They are hard to get off a new mat, if you are using the correct setting for your paper, you may just have to take it slow removing them when your mat is still new.
I find it easier sometimes to remove the mat from the cut flowers instead of getting the flowers off of the mat. Hope that makes sense.
Thank you! It’s always nice to hear what works for others. 🙂
Have you made bigger ones? I’ve seen others make large like 20” ones and I don’t understand how unless they are rolling more than one?
I have not. I’m sure they are cut out larger. There are also flower petals, so I would say they may have a rolled flower center, and then larger petals added on one at a time. I have seen them done that way!