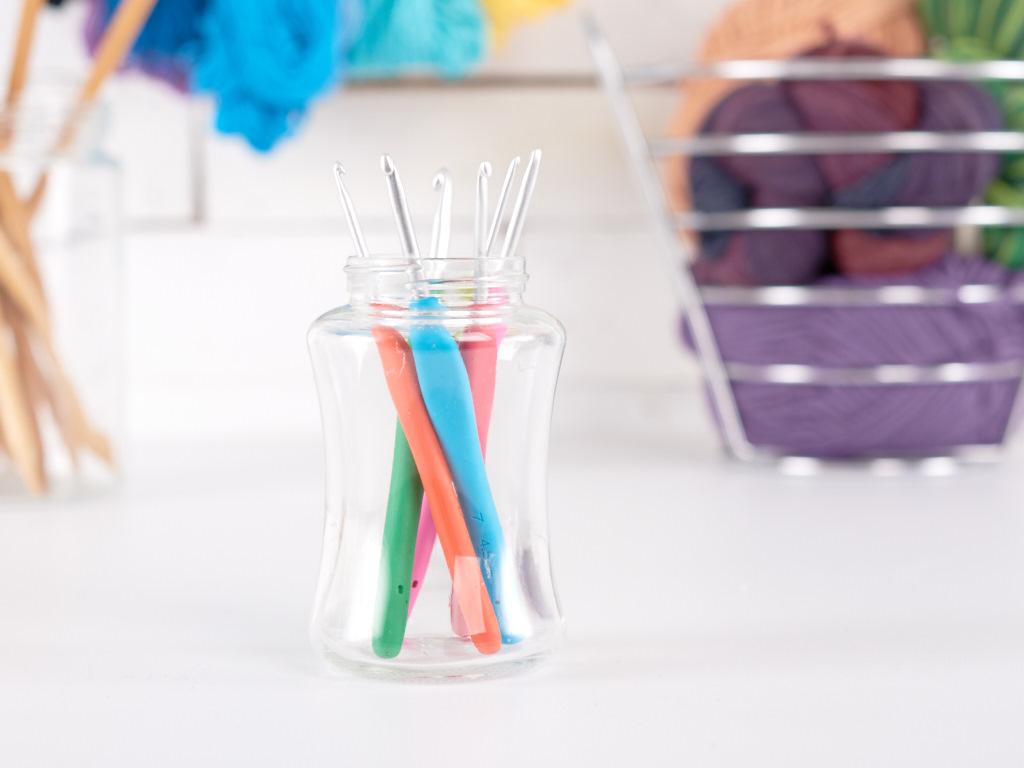
The Looped in Love Skirt was inspired by my Dragon Wing Scarf. I love the way the increases work within the Jacob’s Ladder Stitch, and it just screamed “make me a flared skirt!!” I learned a long time ago, when a yarn or stitch pattern talks to me, it’s in my best interest to listen. So here it is, a fun skirt for all ages that flares between vertical sections of looped stitches. It’s made from the top down, so it can be made to any length that suits your fancy. The longer the skirt, the more yarn it will take.
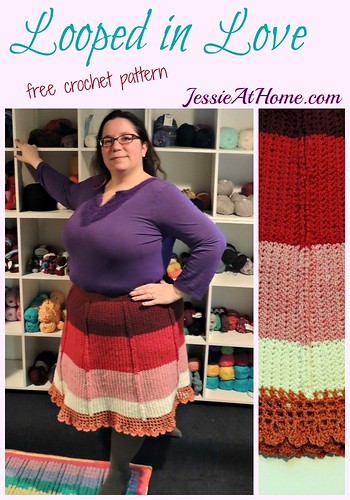

Looped in Love Skirt
Crochet Pattern
Intermediate Skill Level
Designed by Jessie Rayot
Size:
Measure hips and choose the size that is the closest without being smaller.
Chd S (Chd M, Chd L, XS/S, M, L, 1x, 2x, 3/4x, 5x)
Hips: 24 (28, 32, 36, 40, 44, 48, 52, 56, 60)
Yarn:
Crystal Palace Yarns, Allegro DK, 100% Merino Wool, 146 yds/50 g
Color 6035, Merlot: A
Color 6028, Tandoori: B
Color 6023, Tea Rose: C
Color 6000, Ivory: D
Color 6049, Butternut: E
Hook:
US-G, 4.0mm
Gauge:
8 sts x 14 rows = 4” [10 cm] in spider st: see notes for gauge swatch pattern
Other supplies:
Yarn Needle
3/4″ waistband elastic – enough for waistband
1 stitch marker
Stitches and Skills used:
bptc ~ back post treble crochet
ch – chain
dc ~ double crochet
fsc – foundation single crochet
sc ~ single crochet
sl st ~ slip stitch
sp(s) ~ space(s)
st(s) ~ stitch(es)
Notes:
Gauge swatch
Row 1: Ch 32, turn, (sc, ch 2, sc) in second ch from hook, * skip 2, (sc, ch 2, sc) in next ch, repeat from * to end.
Rows 2~ 16: Turn, do not chain, (sc, ch 2, sc) in each ch-2 sp across.
Measure within swatch to check gauge. Each (sc, ch 2, sc) counts as 1 spider st. For the purposes of this pattern, st gauge is more important than row gauge.
The waistband on this pattern is made so that 3/4″ elastic can be run through it without creating a lot of extra bulk. If you have purchased one of my crochet skirt sale patterns with my “less bulky waistband” you can certainly use that as a replacement for this. I do like that one better, but for now it is only part of my sale patterns.
Stitch counts are listed at the end of rounds. For the stitch counts, one spider st (sc, ch 2, sc) counts as 1 st, and the ch-7 also counts as 1 st. This will make checking your stitch count much easier. The set up for an increase (sc, ch 2, sc, ch 2, sc) is also counted as just 1 stitch.
Yarn amounts are not listed because the skirt can be made to any length. The longer the skirt, the more yarn will be used. The size 2x skirt in the sample is made as follows:
Color A (3 skeins): Rounds 1-21
Color B (3 skeins): Rounds 22-41
Color C (3 skeins): Rounds 42-60
Color D (2 skeins): Rounds 61-70
Color E (2 skeins): Border
Pattern:
Waistband & skirt top:
Rnd 1: With color A, fsc 96 (112, 128, 144, 160, 176, 192, 208, 224, 240), sl st to top of first fsc to form a loop.
~or~ ch 97 (113, 129, 145, 161, 177, 193, 209, 225, 241), sc in 2nd ch from hook and in remaining 95 (111, 127, 143, 159, 175, 191, 206, 222, 238) chs, sl st to top of first sc made to form a loop. – {96 (112, 128, 144, 160, 176, 192, 208, 224, 240) sc}
Rnd 2: Ch 3 (counts as first dc), dc in each st around, sl st to top of beginning ch 3 to join.
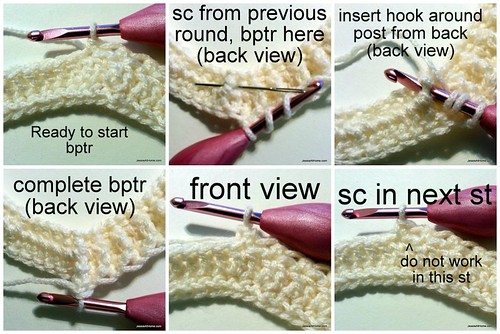
Rnd 3: * Bptr in sc UNDER next st, sc in next st, repeat from * around, sl st to top of first bptr to join.
Note: from the front you will have worked a sc in every other dc from round 2, from the back you will have worked a post st tr in every other sc from round 1. Here are some images to help.
Rnd 4: *Sc in next 11 (13, 15, 17, 19, 21, 23, 25, 27, 29) sts, ch 1, skip 1, repeat from * 7 more times, sl st to top of first sc. – {96 (112, 128, 144, 160, 176, 192, 208, 224, 240) sts}
Rnd 5: *[Skip 1, (sc, ch 2, sc) in next st] 5 (6, 7, 8, 9, 10, 11, 12, 13, 14) times, ch 7, skip 2; repeat from * 7 more times, sl st to top of first sc. – {48 (56, 64, 72, 80, 88, 96, 104, 112, 120) sts}
From this point forward, place a st marker around the last ch-7 of the round to denote the end of the round, move the st marker upon completing each round.
Rnds 6-10: *(Sc, ch 2, sc) in each ch-2 sp until ch-7 is reached, ch 7, repeat from * 7 more times, sl st to top of first sc. – {48 (56, 64, 72, 80, 88, 96, 104, 112, 120) sts}
Rnd 11: *(Sc, ch 2, sc, ch 2, sc) in first ch-2 sp, (sc, ch 2, sc) in each ch-2 sp until ch-7 is reached, ch 7, (sc, ch 2, sc) in each ch-2 sp until only one ch-2 sp remains before the next ch-7, (sc, ch 2, sc, ch 2, sc) in next ch-2 sp, ch 7, repeat from * 3 more times, sl st to top of first sc. – {48 (56, 64, 72, 80, 88, 96, 104, 112, 120) sts}
Rnds 12-20: *(Sc, ch 2, sc) in each ch-2 sp until ch-7 is reached, ch 7, repeat from * 7 more times, sl st to top of first sc. – {56 (64, 72, 80, 88, 96, 104, 112, 120, 128) sts}
Rnd 21: *(Sc, ch 2, sc) in each ch-2 sp until only one ch-2 sp remains before the next ch-7, (sc, ch 2, sc, ch 2, sc) in next ch-2 sp, ch 7, (sc, ch 2, sc, ch 2, sc) in next ch-2 sp, (sc, ch 2, sc) in each ch-2 sp until ch-7 is reached, ch 7, repeat from * 3 more times, sl st to top of first sc. – {56 (64, 72, 80, 88, 96, 104, 112, 120, 128) sts}
Rnds 22-30: *(Sc, ch 2, sc) in each ch-2 sp until ch-7 is reached, ch 7, repeat from * 7 more times, sl st to top of first sc. – {64 (72, 80, 88, 96, 104, 112, 120, 128, 136) sts}
Repeat rounds 11-30 to desired length before bottom border, changing colors as desired. It is not necessary to end on a repeat of round 30, the border can be started after any round.
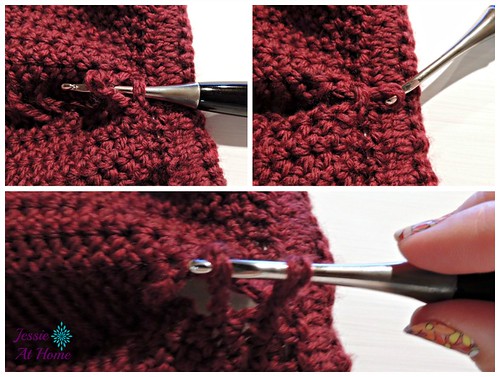
Looping the ladders:
Insert hook from front to back under a ch-1 from round 4, grab the ch-7 from round 5 with the hook and pull it through the ch-1, *pull the next ch-7 through the loop just made, repeat from * until all the ch-7s have been looped through each other. The last loop will be secured with the first round of the border.
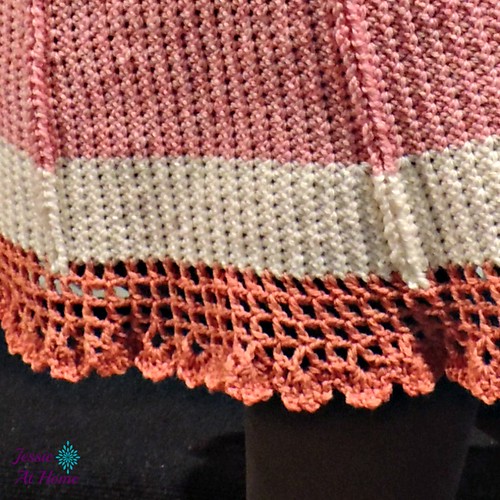
Bottom Border:
Rnd 1: Ch 5 (counts as first dc and ch-2), * dc in next ch-1 sp, (ch 2, dc in next ch-1 sp) to ch-7 loop, sl st in ch-7 loop, ch 1, repeat from * to end of round, sl st to 3rd ch of beginning ch 5.
Rnds 2-3: Ch 5 (counts as first dc and ch 2), *dc in next dc, ch 2, repeat from * to end of round, sl st to 3rd ch of beginning ch 5.
Rnd 4: Ch 6 (counts as first dc and ch 3) dc in same st as join, ch 1, dc in next dc, ch 1, *(dc, ch 3, dc) in next dc, ch 1, dc in next dc, ch 1, repeat from * to end of round, sl st to 3rd ch of beginning ch 5.
Rnd 5: Sl st into ch-3 sp, ch 3 (counts as first dc), 4 dc in same ch-3 sp, ch 1, skip 1 dc, sc in next dc, ch 1, *5 dc in ch-3 sp, ch 1, skip 1 dc, sc in next dc, ch 1, repeat from * to end of round, sl st to top of beginning ch 3.
Rnd 6: *Sl st after next dc, (ch 3, sl st after next dc) 3 times, ch 1, sl st in sc, ch 1, repeat from * to end of round, sl st to first sl st.

Finish off and weave in ends. Thread elastic under the post sts on the inside of the waistband, sew elastic end together.
Wear or give and enjoy!

If you enjoy this free crochet pattern, please consider buying some of your supplies from one of these affiliate links. Thank you.

[signature]


So pretty! And I love the color combo. Thank you so much for the pattern! I can picture it in a combination of pastels for a special little girl.
Thank you so much for this pattern. I love the fabric, flare and especially the delightful detail of the edging!!
I like this one the best. Especially the edging on the hem! I like learning new stitches.
So very pleased to see crochet skirts with elegance.I’ve been waiting a long time for my size too. Keep up the great designs l sure am enjoying them. Thanks a whole bunch ❤️
You are welcome, and Thank YOU!!
Hi Jessie,
I’ve just started crocheting this skirt, and find myself bamboozled by round 5 of the top of the skirt. It says to repeat from *, but there was no *.
I’ve tried a couple of different variations, and neither worked out with the right number of stitches.
I fixed it. the * is at the beginning, but you skip 2 at the end because there is the skip 1 at the beginning that add on to make 3.
I’m working on Looped in Love. Is this worked in a spiral in the round, or is it turned at the end of each row. I’m not sure which row is the right or wrong side of work.
It’s worked without turning.