
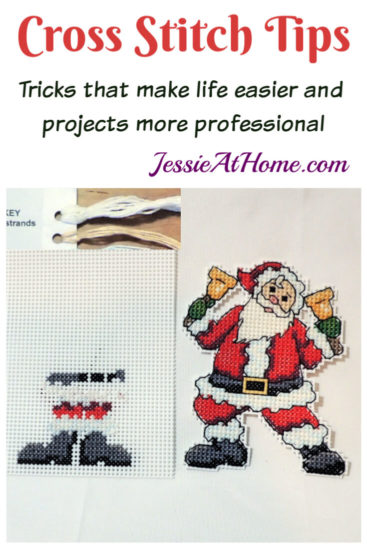
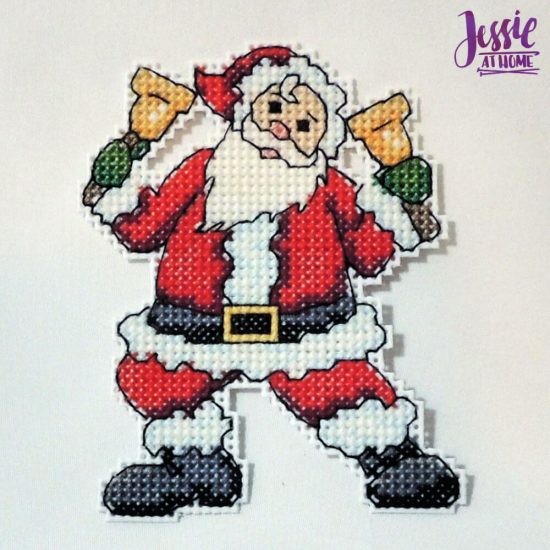
Cross stitch tips and tricks sometimes seem like closely held secrets. Well I’ve decided to share mine with you today. I’ve been working on a plastic canvas ornaments kit with my daughter, Vada. As I gave her tips, I made notes to share with you.
The product used in this post was provided by Design Works. All opinions are my own.
This set of cross stitch tips is geared towards plastic canvas kits, but all the tips work for pretty much any cross stitch.
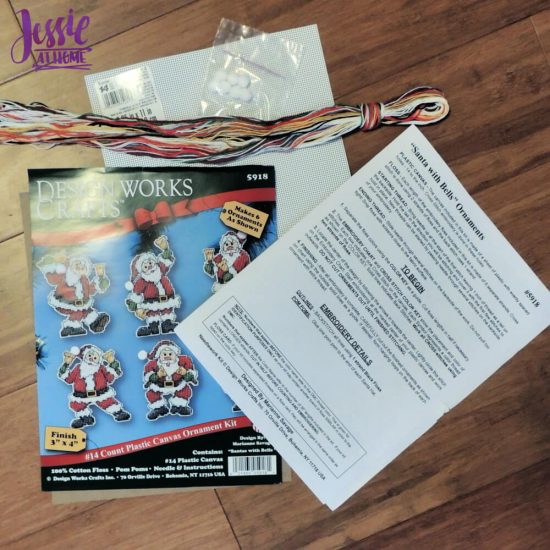
When you begin a new cross stitch, the first thing you want to do is make sure you have all your parts. If you have a kit such as this one make sure you have everything listed and collect any additional supplies listed. Scissors aren’t always listed, but you will want a sharp pair of small scissors or thread clips.
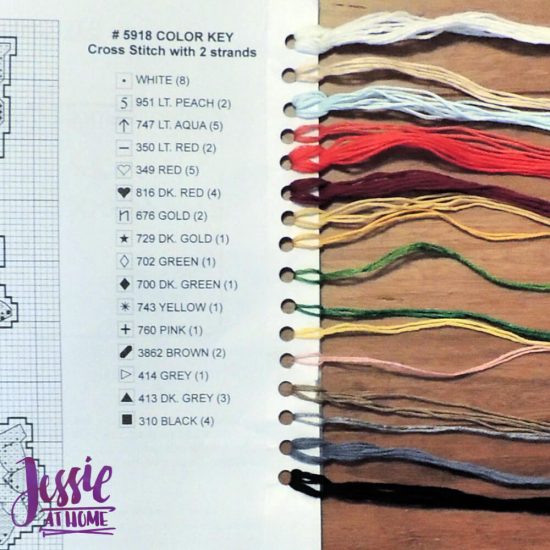
Now that you have all your parts, my next cross stitch tip is to organize your thread. In kits the thread is usually cut to usable lengths and the color key lists how many pieces you should have of each color. In the photo above I have put clear tape down the side of the paper next to the key. Next I punched a hole for each color. As I pulled each color out, I looped them into the holes in the same order as the color key.
Embroidery thread is six strands. Your directions will tell you how many strands to use. Most of the time 2 strands are used for the cross stitches and 1 strand is used for back stitches.
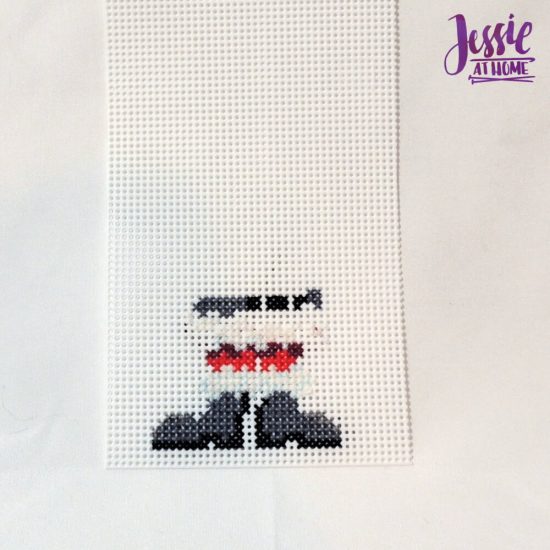
This cross stitch tip is one that will really improve the look of your finished piece. Always make your first part of your stitch in the same direction. So, on the piece below I started each stitch with the cross that went from bottom right to top left. I may have started on the top or bottom, but the first stitch of each cross always leaned in the same direction.
You do this because the stitches catch the light differently based on which way the top stitch of each cross leans, so you want them all to be the same.
So those are some of my favorite cross stitch tips that relate to plastic canvas kits. I hope they help you create beautiful pieces. Of course, you can also use these tips in other cross stitch and needlepoint projects.
Here are some other great plastic canvas cross stitch ornament kits from Design Works. Enjoy!

©Copyright 2019 Jessie Rayot / Jessie At Home All my videos, patterns, charts, photos and posts are my own work, so you may not copy them in any way. If you want to share this information with someone, then share the link to this post. If you want to share on your own blog / website, then you may use the first photo in this post and link back to this post. You may not give away printed copies of this post. Thank you.


Love the tip for organizing the floss!
Thank you. That’s my favorite one!
Also, always work over your tails, don’t tie knots, and hand wash your piece when finished to wash away the oils from your fingers.
I love the plastic canvas cross stitch kits but I can no longer find them locally. Did you get yours from Mary Maxim? That’s the only place I’ve seen them recently.
Wonderful tips! I got my kits from Design Works directly (the manufacturer) but you may be able to find some on https://www.herrschners.com/