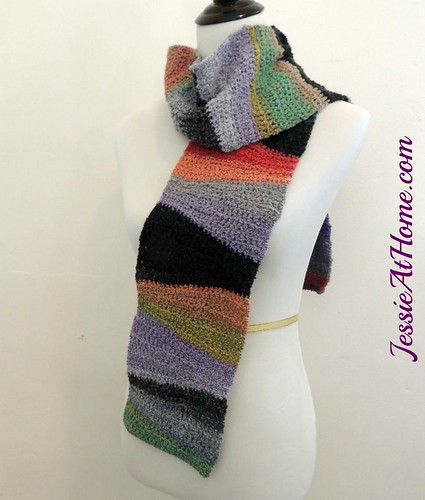
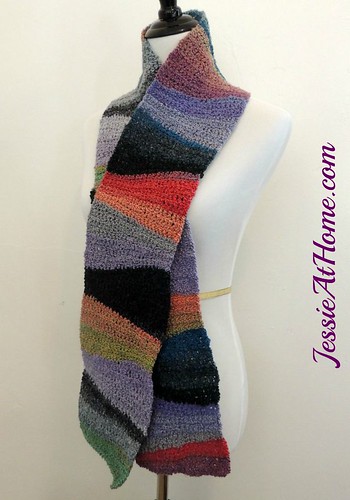
This spectacular scarf has a similar look to short rows, without using short rows! Instead, stitches of different heights are used to make the growing and shrinking rows. Three color ways of Lion Brand Textures are used in this scarf, though you could also use 3 skeins of the same colorway and get a more muted, yet still very nifty, effect. So, grab your Lion Brand yarn and hook and get ready for the colder weather.
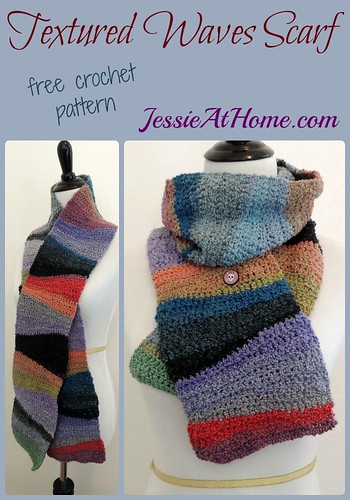

Textured Waves Scarf
Crochet Pattern
Intermediate Skill Level
Designed by Jessie Rayot
Size:
64″ x 6 1/2″
Yarn:
Lion Brand Textures: 90% Acrylic, 10% Nylon; 3 oz/85 g/136 m/149 yds per skein
1 skein or 75 g/130 yds color A: Meadow Flowers 201
1 skein or 75 g/130 yds color B: Arctic Sky 203
1 skein or 75 g/130 yds color C: Ocean Waves 204
Hook:
US 7/4.5mm
Gauge:
14 sts x 8 rows = 4″ in double crochet
Other supplies:
yarn needle
Stitches and Skills used:
ch ~ chain
sc ~ single crochet
hdc ~ half double crochet
dc ~ double crochet
st(s) ~ stitch(es)
Getting Started:
This pattern requires a lot of attention, the sts change every row. If you have made a mistake, you will need to go back and fix it or the geometry of the pattern will not work.
Pattern:
Make scarf using the following pattern and color sequence:
Starting Half Section, color A, then alternate between wave 1 and wave 2 until there are a total of 20 waves after the starting half section, all the while rotating through the 3 colors (so after A comes B, then C, then back to A again…), lastly, make the Ending Half Section, in color A
Starting Half Section:
Row 1: Ch 25, sc in 2nd ch from hook and next 4 chs, hdc in next 8 ch, dc in next 11 ch. ~ 24 sts
Row 2: Turn, ch 3 (counts as dc here and throughout), dc in next 8 sts, hdc in next 8 ch, sc in next 7 sts. ~ 24 sts
Row 3: Turn, sc in first 9 sts, hdc in next 8 sts, dc in next 7 sts. ~ 24 sts
Row 4: Turn, ch 3, dc in next 4 sts, hdc in next 8 ch, sc in next 11 sts. ~ 24 sts
Wave 1:
Row 1: Turn, ch 3 (counts as dc here and throughout), dc in next 10 sts, hdc in next 8 ch, sc in next 5 sts. ~ 24 sts
Row 2: Turn, sc in first 7 sts, hdc in next 8 sts, dc in next 9 sts. ~ 24 sts
Row 3: Turn, ch 3, dc in next 6 sts, hdc in next 8 ch, sc in next 9 sts. ~ 24 sts
Row 4: Turn, sc in first 11 sts, hdc in next 8 sts, dc in next 5 sts. ~ 24 sts
Row 5: Turn, ch 3, dc in next 4 sts, hdc in next 8 ch, sc in next 11 sts. ~ 24 sts
Row 6: Turn, sc in first 9 sts, hdc in next 8 sts, dc in next 7 sts. ~ 24 sts
Row 7: Turn, ch 3, dc in next 8 sts, hdc in next 8 ch, sc in next 7 sts. ~ 24 sts
Row 8: Turn, sc in first 5 sts, hdc in next 8 sts, dc in next 11 sts. ~ 24 sts
Wave 2:
Row 1: Turn, sc in first 11 sts, hdc in next 8 sts, dc in next 5 sts. ~ 24 sts
Row 2: Turn, ch 3 (counts as dc here and throughout), dc in next 6 sts, hdc in next 8 ch, sc in next 9 sts. ~ 24 sts
Row 3: Turn, sc in first 7 sts, hdc in next 8 sts, dc in next 9 sts. ~ 24 sts
Row 4: Turn, ch 3, dc in next 10 sts, hdc in next 8 ch, sc in next 5 sts. ~ 24 sts
Row 5: Turn, sc in first 5 sts, hdc in next 8 sts, dc in next 11 sts. ~ 24 sts
Row 6: Turn, ch 3, dc in next 8 sts, hdc in next 8 ch, sc in next 7 sts. ~ 24 sts
Row 7: Turn, sc in first 9 sts, hdc in next 8 sts, dc in next 7 sts. ~ 24 sts
Row 8: Turn, ch 3, dc in next 4 sts, hdc in next 8 ch, sc in next 11 sts. ~ 24 sts
Ending Half Section:
Row 1: Turn, ch 3 (counts as dc here and throughout), dc in next 10 sts, hdc in next 8 ch, sc in next 5 sts. ~ 24 sts
Row 2: Turn, sc in first 7 sts, hdc in next 8 sts, dc in next 9 sts. ~ 24 sts
Row 3: Turn, ch 3, dc in next 6 sts, hdc in next 8 ch, sc in next 9 sts. ~ 24 sts
Row 4: Turn, sc in first 11 sts, hdc in next 8 sts, dc in next 5 sts. ~ 24 sts
Cut yarn and weave in all ends.
Wear or give and enjoy!


If you enjoy what you have found here at JessieAtHome, please like my Facebook page to get all the updates on new tutorials, other posts, sales, and coming events.
If you have any questions or concerns, want to share pictures of your work, or just want to chat with Jessie and other crafty individuals, than join my Facebook group.
If you enjoy this free crochet pattern, please consider buying some of your supplies from one of these affiliate links. Thank you.
©Copyright 2015 Jessie Rayot / Jessie At Home All my videos, patterns and posts are my own work. Do not copy them in any way. If you want to share this information with someone, share the link to this post. If you want to share on your own blog / website, then you may use the first photo in this post and link back to this post. You may not give away printed copies of this post. Thank you.
This post may contain affiliate links/ads. If you purchase something from a link in this post, I may be compensated.


What a beautiful scarf! Can you clarify how often you change colors? Is it each wave or each set of (1&2) waves.
thanks, Julie
I changed color after each wave.
Thanks! I’m looking forward to making it while on a long road trip.
Jessie,
I’m unclear about adding a “chain 1” before I turn the row and start sc. It doesn’t say to but my edge is coming out jagged. Then do I finish the row in the top of the beginning “chain 3” from the previous row? It’s such a pretty scarf, I really want it to work. Thanks for any help you can give me.
If you want to ad a ch 1 to the rows that start with a sc, you can. Yes, the ch-3 counts as a st, so it’s the last st you work into on those rows.
This looks easy for me, I kindly ask for your permission to try this. I promise you it’s only for myself. Thank you.
Of course, have fun!! You can even make it to give away if you want or sell finished items. It’s only the pattern that is mine, the finished item is yours. 🙂
Thank you!!
I’m happy to report that I’ve successfully made the scarf! However, since I have no social media account, so please allow me to describe my finished scarf. It turns out to be a great way to use all my leftover yarns for every wave, interspersed with sky blue and baby blue colors, the starting half and ending half sections are in dark blue. I make no fringes because I like my scarf without any fringes (strange maybe, but it’s true!) Once more, thank you for the pattern!
Thank you, Pat! I’m happy to read that you like the pattern and made what sounds like a lovely scarf!
The ending half section: I am confused by the English meaning. once I reach the half way length of the scarf, I start to crochet this section? Or does it mean once I reach the total length of the desired scarf length, I crochet this part?
AS a teacher of English as a Foreign Language, this can be confusing… Thank you.
I can see how that could be confusing to a non-native English speaker. I have enough problems with just one language!
First make the starting half section.
then make:
Wave 1
Wave 2
Wave 1
Wave 2
and keep making Wave 1 and then Wave 2 until you are happy with the length of your scarf
Be sure to end with Wave 2
Now finish off with the Finishing Half Section.
I hope that was understandable. If not, please feel free to ask in my facebook group and I can draw a picture for you. 🙂
https://www.facebook.com/groups/JessieAtHome